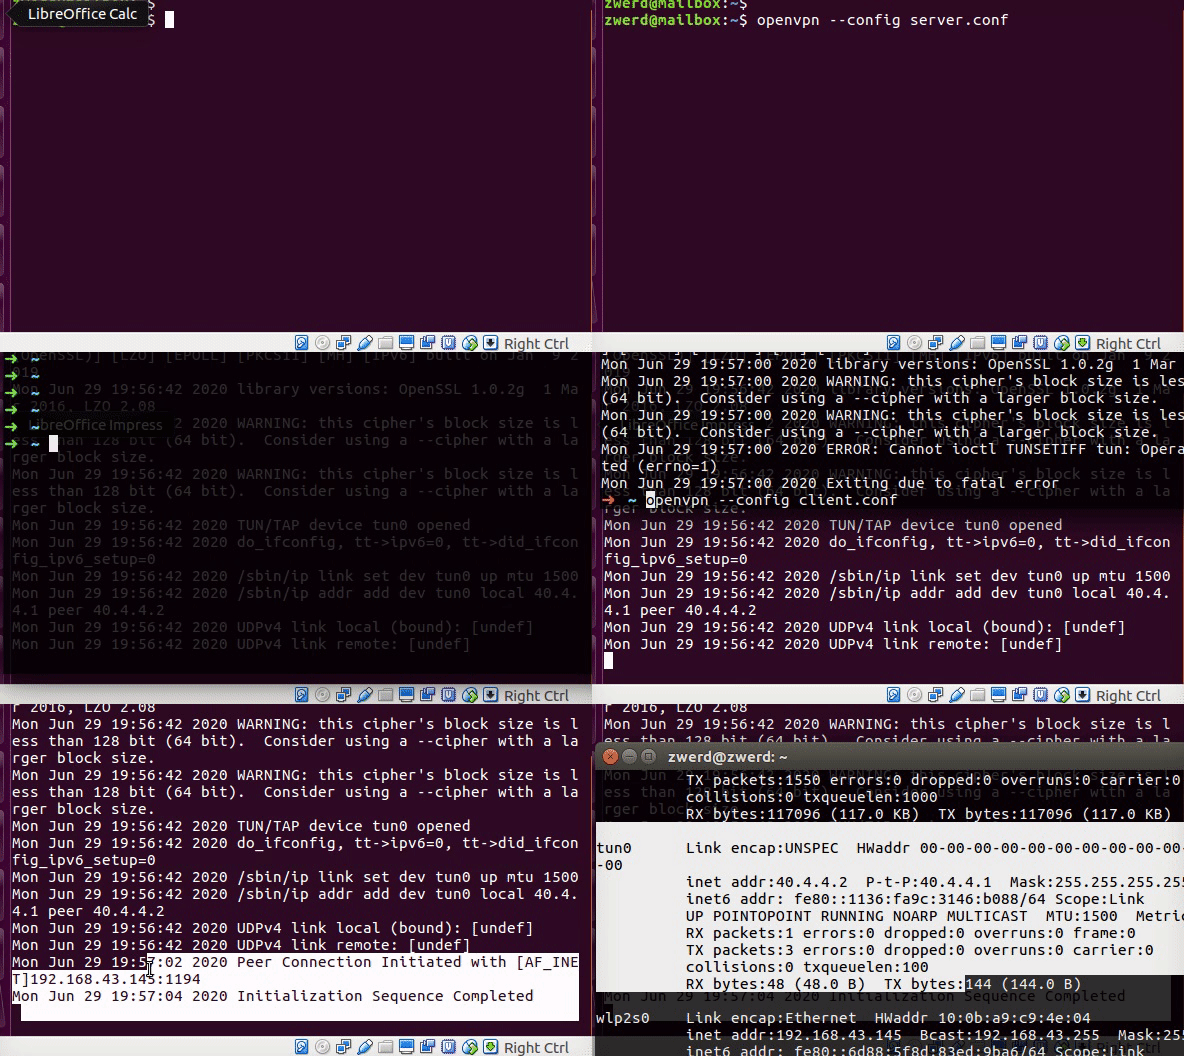
Linux from Novice to Professional Part 2 - Application Level.
After I finish the learning for my LPIC2 201 objective, The COVID-19 epidemic came to my country and test centers were closed so I couldn’t take the test, at least I got a refund as scheduled for the test date. What is happening right now is that I cannot take the first LPIC2 exam, and because I am very energized to learn to Linux and get to know all the cyber and hacking issues associated with it, I am writing this post. In the current post unlike its predecessor, I am going to write about every components, tools and knowledge, for inform you what you need to know for exam 202, in addition to focusing on the hacking issues that are hiding in the same tools that we are going to note here. This is how this article will be much more interesting and attractive for OSCP studies that I will do later. You can of course send me a message if there is a question or comment.
Objective 201-450
Chapter 0
Topic 207: Domain Name Server.
If we going to take about DNS, there is things that we need to be familiar before we start to talk about BING which is DNS system that can be run local on our network and provides information for our host. DNS is short for Domain Name Service, all the PC’s and machines like printers or scanner’s need IP address for communicate on the local network, there is sort of hierarchy in the networking world for allowing communication, but for people to remember numbers is difficult so instead we can use name convention, the DNS server is actually convert the name to IP or reverse it so the communication can be accomplish although we use names and not IP addresses.
In the DNS world every privet network may contain DNS server, when a client want to get some server online over the Internet, he run a query to the local DNS server to get the IP address for the name server the client what to connect, then the DNS server will respond with the DNS answer that contain that IP address and the client can create packets and send it to the destination by specefied the IP as the destination address and start the communication, in case the local DNS don’t know the IP address for that name, it will query the ISP DNS server, if the ISP dosn’t know about that name is make query to another DNS server that may be the Domain Nameservice like “GoDADDY” or other online nameservice. This hierarchy is done for prevents the client to sent query to the Nameservice, just imagine that every client over the world will query the name he search for over the public nameservice, this server will fall down because of the load.
There is a several command that we can use for see the convert, the first one is nslookup this command can work on our Linux distribution and also on windows machine, we use it to find out what is the IP address for some domain name.
1
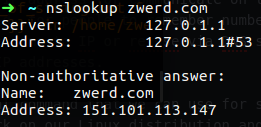
nslookup zwerd.com
By running that command I make a query to the DNS server to find out what is the IP address for the zwerd.com domain.
You can see that the server address (which is the DNS server) is our local machine 127.0.0.1, also you can see that this server is non-authoritative which mean that the local server has cache for that query but it not the authoritative server, in that case the cache is save for amount of time and after the time is run out it will run new query again to get that information.
We also can run just nslookup and it will bring the cli for it, so we can use option like set to set the query and change it for our needs.
We can also use host command, this also give us the same information like nslookup does, but also it will give us the mail information which is the mail handler, we can see that information with nslookup by using the set q=mx option but by default the nslookup dosn’t show us the information.
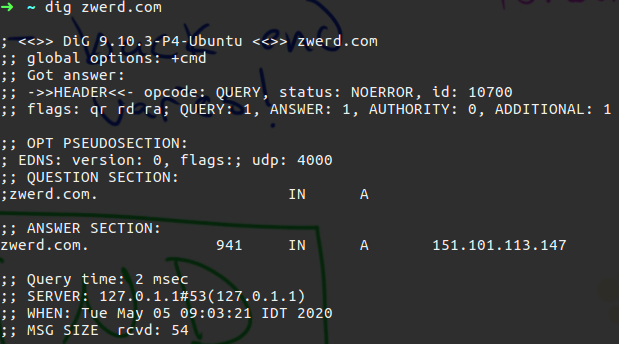
There is another tool that can bring us that information and it called dig, this command can also show us the query time and the cache time.
You can see on the answer section the cache time that is 941 second, which mean that if doring that time someone will trying to get the same query information it will get the information from our server without the server will query the ISP DNS, we also can see the Query time that is 2 msec and that the local server is 127.0.0.1, we can change that query for example to request google DNS server which is 8.8.8.8 by run the following:
1
dig @8.8.8.8 zwerd.com
This will give us the query information from google, we can also do that query via nslookup by using the server option for get the same information from google.
In the linux world we can us BIND for setting up DNS server, there is more DNS servers type that we need to know, the djbdns software package is a DNS implementation. It was created by Daniel J. Bernstein in response to his frustrations with repeated security holes in the widely used BIND DNS software. There is also the PowerDNS, this is a DNS server that developed by PowerDNS Community, Bert Hubert, it written in C++ and licensed under the GPL. It runs on most Unix derivatives. PowerDNS features a large number of different backends ranging from simple BIND style zonefiles to relational databases and load balancing/failover algorithms. Also there is the dnsmasq which is free software providing DNS caching, DHCP server, router advertisement and network boot features and it intended for small computer networks. This was developed by Simon Kelley and release on 2001, it also Unix-like operation system and it has GPL license.
In the DNS world there is two type of DNS server, forwarding and caching, in the forwording the DNS get the query and try to get the information from the next step DNS which will be likly the ISP DNS and give the client the name information for his query, in the caching style the local DNS server will get the query from the client and trying to build up the cache information for the domain query by the client and this is include the MX information, the A record and all other information that related to this domain, this is done by query the root DNS server, and the register and also the nameserver for get this all information and store it locale.
Let’s install the bind on our machine, I am using ubuntu so I need to run the following:
1
sudo apt install bind9 bind9utils
After we finish the installation we will see new folder on etc named bind, this folder contain the configuration file for our BIND server.
The file we want to look it is named.conf this file contain link files that going to be use for our server, you can see the other files that we may need options*, **local and default-zones.
The options file contain the configuration for our server, we can setup the fowording or cache server with that file, right now we going to bring up a cache DNS server in that BIND system.
On the following image you can see that every line start with “//” this is a comment out line (this is C style for comment stuff) so those line not be use, you can see the forwording option, we can set there the IP address for the ISP DNS server which will make our server as forwording one.
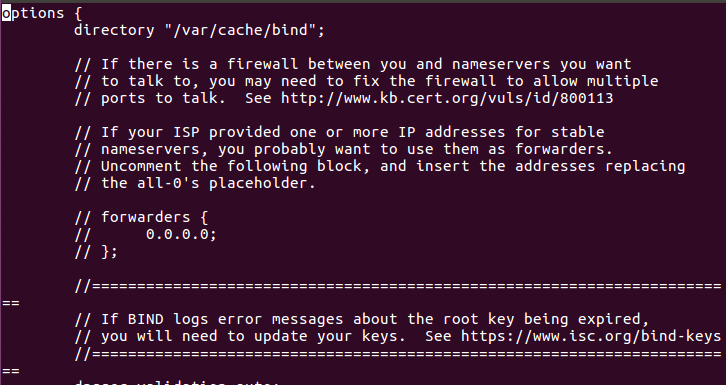 Figure 5 The named.conf.options file.
We want to setup a cache server so we need to add more line that contain the following:
1
recursion yes;
Don’t forget to add the semi colon at the end of the line else it won’t be able to work.
 Figure 6 The recursion line at the END.
Now what we need is to restart the BIND service.
1
sudo service bind9 restart
Now for check that it working we can run the following:
1
dig @localhost google.com
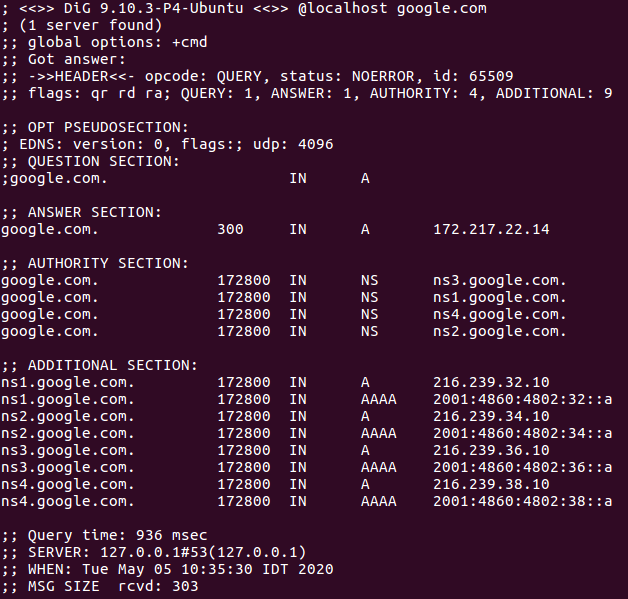 Figure 7 Using dig on localmachine to get google information.
You can see that the query time was 936 ms and we also see that the cache time is 172800 seconds so in that case it caching up that query for 120 days, this is mean that if other machine on that network will query our server for google it will get the cache information that has beeing cache. If we will run dig again it will show us that the query time was very short because it cached.
If we have some domain name that we want to setup locally on our server we can do so, this will make the server to answer a query with what we setup. This type of local domain name in the bind world called zone, so we need to create zone file in order to make the server to answer the request with what we need.
Also we can setup a revers domain lookup, if we run the nslookup against IP address it can bring us the name for that domain, likewise we can use dig to do so, let’s create our own zone.
First we need to look at the local file, this file will point to the configure files for the zone we setup, so we need to setup the follow:
1
2
3
4
5
6
7
8
9
zone "zwerd" {
      type master;
      file "/etc/bind/db.zwerd";
};

zone "1.168.192.in-addr.arpa" {
      type master;
      file "/etc/bind/db.1.168.192";
};
The zone name for my case is zwerd, the type master mean to lookup for local database, this is mean the name for that domain can be found locally. The file say were the zone file will be located, please note that the file can be called what you like but I prefer to use the name conventions for that file.
the second list is for reverse domain backup so I specified the subnet for that domain in reverse way, so this is 1.168.192.
So now I need to create those two files, so I will run the following
1
2
sudo cp db.local db.zwerd
sudo cp db.127 db.1.168.192
So now I have the new file ready, we just need to make the changes for the query for the zwerd domain will get to answers.
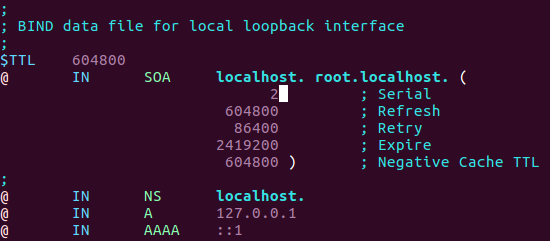
On that file you can see the SOA which is sort for Start of Authority record, this will contain the domain name and more information like the retry time and expire type, the serial number is used to make change, in our case the serial is 2 right now, after we done to change the file we must to increase that number for the changes take a place.
We also can see the NS, A and AAAA records, the AAAA records used for IPv6 so we can ride of that, the A record contain the IP address for that domain host, so after we done to change that file it can be something like as follow:
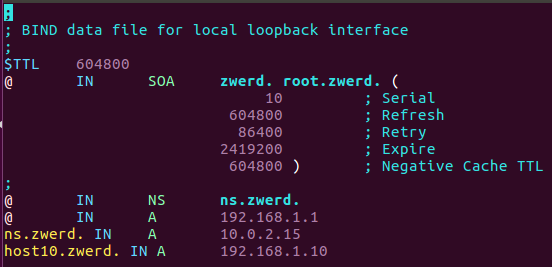 Figure 10 The db.zwerd file after changes.
Please remember: in this file we can specefied www as A record to the server we want, in case the client try to dig www.zwerd. iformation it will get this www IP address, and this is how it work over the Internet.
You can see that I increase the serial number, I also change the SOA to contain the domain name, you can see the dot at the end which is must be specefied, if you dont understand that please watch the following.
You can see the name service and the IP address for zwerd domain, please note the @ at the begin of the line which specefied that this is related data to zwerd domain.
I also specefied the ns.zwerd. IP address and also some host named host10, if someone will try to ping that host he will get that IP address as an answer.
After we finish with the zone file we can run named-checkzone for verified that this file syntax are correct.
 Figure 10-1 the
 named-checkzone util.
named-checkzone checks the syntax and integrity of a zone file. It performs the same checks as named does when loading a zone. This makes named-checkzone useful for checking zone files before configuring them into a name server.
We can also use the named-checkconf for checking the configuration file at once, for example by running named-checkconf -p, it will print on the screen all of the configuration file you have in bind, also the command named-checkconf -z to perform a test load of all master zones found in named.conf.
Now I need to create the revers file for that domain, so I need to change the db.1.168.192 file.
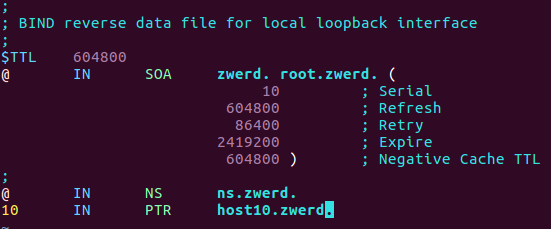 Figure 11 The db.1.168.192 file after changes.
You can see that I also specified here the ns server which is local, so I used the @ for it, also the host10 which is 10 on my case.
Now we need to reload the rndc which going to reload the BING configuration file which is recommended to do instead to restart the Bbing9 service, because in that way we will lose the cache we have on the server, so rndc is what we need.
1
sudo rndc reload
Now, if I run the dig against that zwerd domain it should work and show us that the zwerd address is 192.168.1.1, just note to run dig with @localhost to query from local machine.
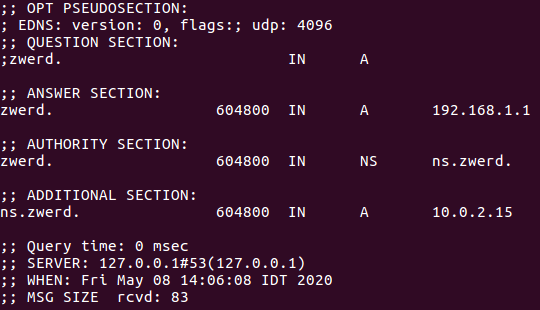 Figure 12 Lookup for zwerd domain from local cache.
You also can see the ns record which in 10 network, this is bacause this machine address is 10.0.2.15 and since I specefied the ns record to be local by using @ sing, this is the address we get from the cached.
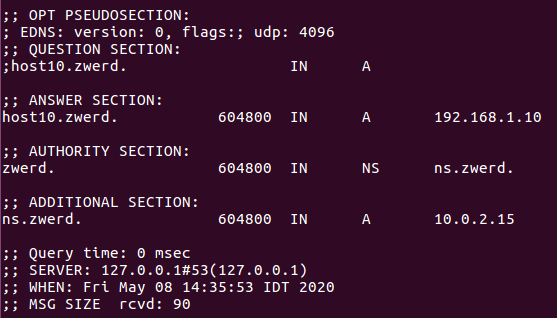
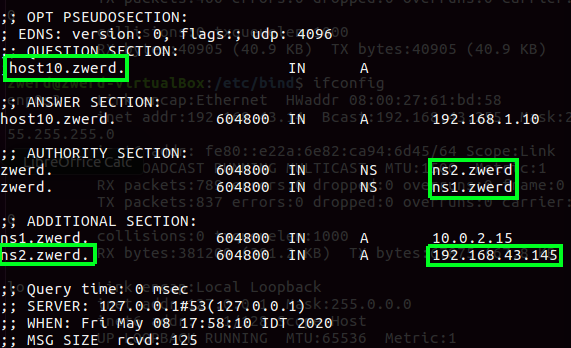
Now if I try to dig the host10 I should get the address we setup on the db.zwerd file.
1
dig @localhost host10.zwerd
You can see that the address is 192.168.1.10 which is the record for host10 on our local cache. We can run reverse lookup to see if we setup that corectly, we just need to use the -x option for tell dig that it reverse query.
1
dig @localhost -x 192.168.1.10
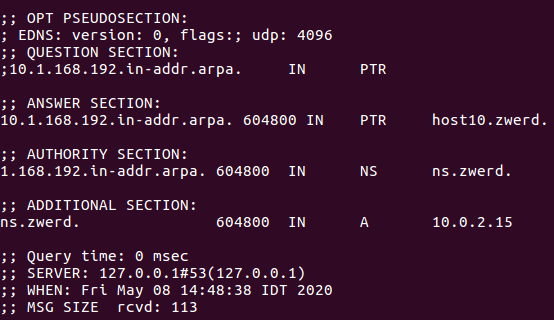 Figure 14 Lookup for 192.168.1.10.
You can see that this is PTR which mean pointer for host10. I also run it on nslookup and change the server to be localhost, you can see that it give me the reverse address for it which is host10
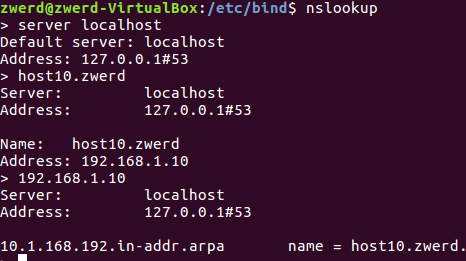 Figure 15 using nslookup for 192.168.1.10.
Let’s talk about redundancy, if we have DNS server on our organization and that server failed we can setup another server to take a place in that case, on the bind we setup that as master and slave servers, on the master we specified the slave address for transfer the records for it, on the slave we need to set it to cache the record locally, so if the master failed the clients on our organization can send query to our slave.
On the master server which is my Ubuntu we need to add more line on the named.conf.local and inside that we insert the follow under the zone “zwerd”:
1
allow-transfer { 192.168.43.145; };
So in my case the slave server address is 192.168.43.145 and this line will make our master to transfer that zwerd zone to the slave (if you want you can set this like as any for anyone can pull the master information), please remember that in my case the master address is 10.0.2.15.
Another change I made is in the db.zwerd file, I add up the new ns server which going to be 192.168.43.145 and named it as ns2.zwerd., also on the local name server I change it from ns to ns1.zwerd..
Also I add new line for NS record and called it ns2.zwerd., please remember that every change you made on this file, you must to update the serial number, after you done, just run the rndc reload.
Before you start to setup the slave it can be a good idea to check that you have communication allow trough the local firewall via port 53 which is used for DNS transformation.
On the slave we need to change the configuration on option file, so I add the following lines:
This setting will allow our machine to listen port 53 for the query he will get, and allow any source to be answered with a query. If you didn’t set these the client query may never answered.
On the named.conf.local file I setup the following:
1
2
3
4
5
zone "zwerd" {
	type slave;
	masters { 10.0.2.15; };
	file "db.zwerd";
};
After we done all we can run the following command for verified that it working:
 Figure 17 Checking the service status.
Please note: if you setup that on CentOS, you need make a changes on /etc/named.conf, also check that you not miss any default configuration like listen-on port 53. After you done, you must run the following command setsebool -P named_write_master_zones true, this command will create the following file /etc/sysconfig/named and enable out local machine to write zone database on our local machine, without that if you try to run dig or nslookup, you will never get the answer you expect.
Please note: for checking that it working correctly on CentOS we can find logs about the named service on the /var/named/data/named.run file.
You can see that I get new 8 records, so now I can just run new query to check if it working for me.
You can see that my query was success and I get the host10 address, also you can see the ns1 and ns2 which is the master and slave servers.
This was save on my cache, this is mean that if I stop the bind on the master I still be able to to get the information with my query because the data is cache locally.
Please remember: on CentOS for install bind we need to run yum install bind and not bind9, also the configuration file is /etc/named.conf which contain all of the setup (not like ubuntu that all are sperated files, options, local and default-zones). We can find the /var/named/ folder that contain more information regarding the bind process, like dump file, statistics-file, and so on. Also remember that the service on CentOS called named instead of bind or bind9.
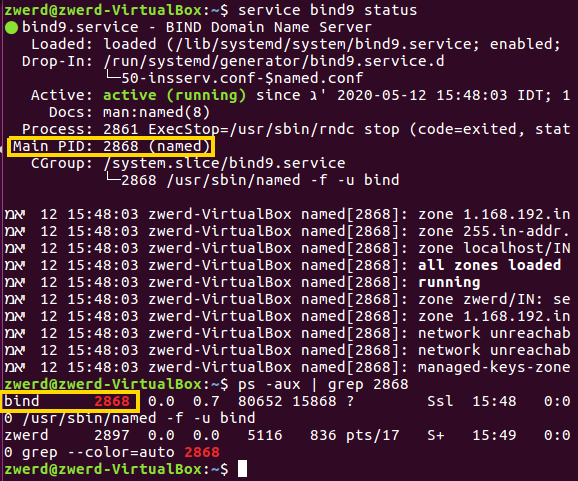
If for some reason you need to kill the bind process, you can check on the service status what is the PID, you can also search for bind on the ps -aux command:
I also want to talk about some issue that sysadmin may have to deal with, this regarding to bind release, with the development of the BIND 9.9 branch, zone file storage for slaved zones has been changed to expect the raw zone format by default. BIND administrators testing 9.9 or preparing for migration from an earlier version have asked how to deal with this format change.
Several options are available, one of them is to use named-compilezone utility which is part of the BIND distribution (install by the bind9-utils we saw earlier), this tool can be used to convert zones from text to raw and from raw to text.
1
2
3
4
5
6
#/bin/bash
# convert raw zone file "example.net.raw", containing data for zone example.net, to text-format zone file "example.net.text"
named-compilezone -f raw -F text -o example.net.text example.net example.net.raw

# convert text format zone file "example.net.text", containing data for zone example.net, to raw zone file "example.net.raw"
named-compilezone -f text -F raw -o example.net.raw example.net example.net.text
The -f stand for input file format, the -F stand for output formate file and -o stand for write the output to filename.
You may ask yourself what is raw file and were is locate, the raw file it is data file formate, you can’t read that file, in fact if you trying to read is by using cat you will see gibberish string which is in our case is binary zone format, this file will be cached most of the time on server that setup as slave for specific zone, you can find those file under /var/cache/bind/.
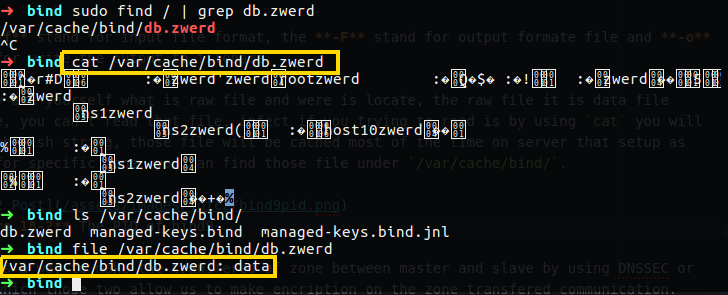 Figure 18-2 You can see that this is raw file.
Like named-compilezone utility that allow you to convert raw file to text, to can also control the formate of zone file that cache on your slave zone server, in the zone section on named.conf.local you need to add the line masterfile-format text;, this will make that slave to save the cached data in text format, for example:
1
2
3
4
5
6
7
zone "mydomain.com" in {
        type slave;
        notify no;
        file "data/mydomain.com";
        masterfile-format text;
        masters { 10.100.200.10; };
};
Let’s talk again about transfered zone, there is a way to make the transfered zone between master and slave by using DNSSEC or TSIG, which those two allow us to make encryption on the zone transfered communication.
The different between those two is that TSIG just help us to encrypted the that transfer from master to slave, only the slave who has the key can decrypt the data and cache the zone’s he got. The DNSSEC is allow us to use encryption and also bring up mechanism to know if we can trust the master zone server.
In DNSSEC we need to setup on the master the privet key and on the slave we must have public key, when the master transfer the zones to the slave and the slave use the public key that he get from the registrar and use that to verified that the master is really the master server that give him the zone information and after verified he save the zone information.
In the TSIG we only encrypt the communication between the servers, there is shared key that both must have in order to start the encrypted communication, in this case the master can start the zones transfer only to DNS servers that contain the shared keys. This type of operation can assure us that the zones transfer communication are encrypted which mean nobody on the middle network can read that data, so let’s setup shared key for now.
So on my Ubuntu I am going to use dnssec-keygen this tool going to create keys for me and can be use for DNSSEC type or TSIG, in correct example we setup a TSIG as follow:
1
sudo dnssec-keygen -a HMAC-SHA256 -b 128 -n HOST -r /dev/urandom zonekeys
In that command we using -a for algorithm which in my case I choose to use sha256, the -b option stand for bit size, so I set it to 128, the -n is the nametype which mean that we can choose to use DNSSEC or TSIG, if we set that for a KEY this mean that this is DNSSEC type, but by using HOST it use the shared key which is the TSIG, the -r option is for urandom this the location for saving random information, and then we specefied the name of the key which is zonekey in my case.
Please note: In order to generate SECURE keys, dnssec-keygen reads /dev/random, which will block until there’s enough entropy available on your system. Some systems have very little entropy and thus dnssec-keygen may take forever, to solve this I use -r /dev/urandom, which is “non-blocking” pseudo-random device (lower security). credit Alex.
You can see that it generate the key, but actually we have now two files, the privet file and the key file, which are both contain the key, in my case it doesn’t really matter because we generate TSIG and not DNSSEC base type.
 Figure 20 The key which contain the name I setup.
You can see both of the files that contain some randome name with the name I specified, let’s look on the private file
You can see that it’s specified the algorithm and the key sting, this string is what we need, on the master we need to do one more thing, create the key file that contain the key we generated and specified that file and key to be use for zone transfer.
You can see that I specified the keyname and the algorithm and also the key itself, now I need to include that key inside the named.conf file.
 Figure 23 Include the TSIG file.
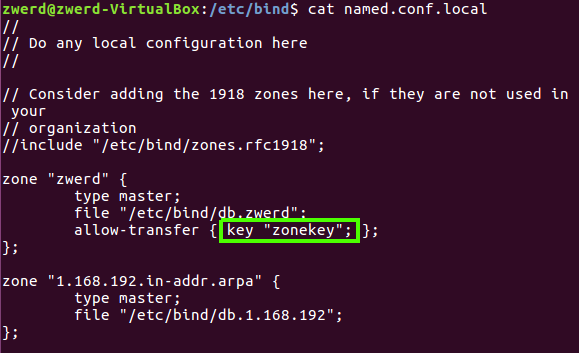
After I done, I need to setup the named.conf.local for the transfered zone can be done only with share key instad of IP address as we saw earlier.
You can see that I specified the key “zonekey” which contain the key I want for this zone transfered to be used.
Now I need to reload rndc for reload the all new configuration files and used it without removing the cached data.
Please note: you can find the rndc on the /usr/sbin/rndc directory.
So we done all what we need on the master side, on the slave side we have more things to do, but before that let’s look on the stat of the service to check for errors.
 Figure 25 The bind9 service status.
You can see that on the slave I unable to fatch the DNSSEC keys, so the operation is canceled, this is because I didn’t setup the key on the slave, in order to make it work I need to setup more things on the slave.
We need to create two files and setup the new configuration for make it work
The tsig file
1
2
3
4
key "zonekey" {
  algorithm HMAC-SHA256;
  secret "s6g6M1XK5KFz+psSaaIg6Q==";
};
The server file:
1
2
3
server 192.168.43.14 {
  keys { zonekey; };
};
On the named.conf file I need to specefied those two file.
Now all I need is to restart the bind9 service and checking the status again.
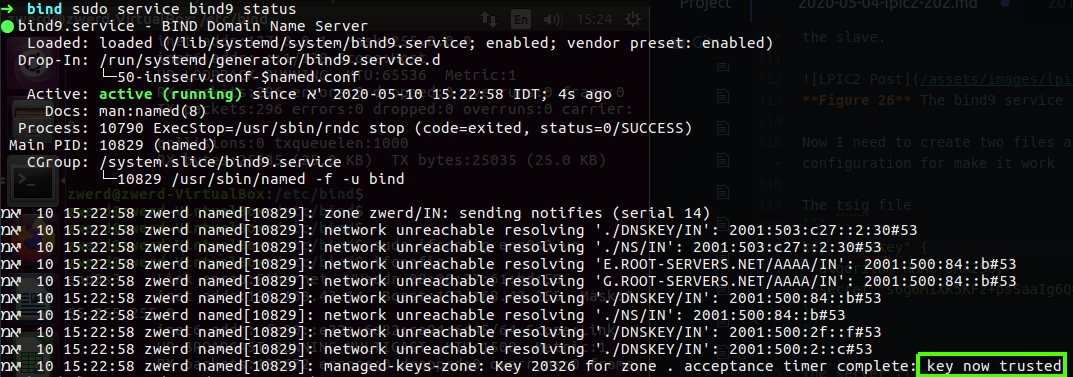 Figure 27 The service running and we have connection trusted.
You can see that the key now trusted, this is mean that we have secure connection with the master and now if I run the dig for host10 I will find it.
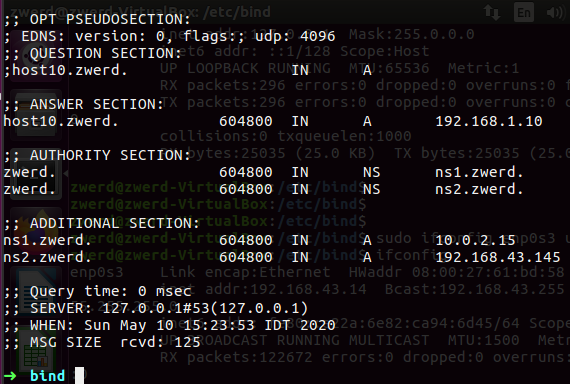 Figure 28 Can see the host10 using dig.
Please note: on CentOS those two file configuration will be on the named.conf and each in saperated section.
If we talk about DNSSEC that method, in that method we allow the other to verified that out master server is actually the trusted server, for doing so we need to create the Zone Sign Key (ZSK) and the Key Sign Key (KSK) you can read more about that on cloudflare, After you have those two keys (ZSK & KSK) you can sign the zone by using dnssec-signzone, you can read more about that on the following like apnic, you just need to know that for sign zone you need to use dnssec-signzone command.
Let’s say that on our organization we want to force our client that if they trying to get the home page of the organization they going to hit the local home page server and not the public site on the internet, in that case we need to create some master zone file on the local DNS for this kind of queries for bring them other IP address that different from the public site.
What will append is that when some one query for this site will send up to the local DNS server, then the local DNS will bring this information from it’s local zone file and will not query the ISP DNS server for that information, this will force the clieant to connect the local site of out organization.
For set this we need to add on the named.conf.local new zone section that set as type of master, this will declering that this server is the master server for our new zone, then we need to go and create new file named db.<zonename> and adding that zone information inside that site.
All we need to do after that is reload the rndc or restart bind9 service.
Now, there is some issue that we need to be aware of is that if someone tries to take advantage that service he can get the root directory and do unwanted stuff to our system files, so in that case we need to isolate the bind process and its children from the rest of the system.
To do so we can use chroot jail, this tool do just that and isolate the process and it’s children from the rest of the system. It should only be used for processes that don’t run as root, as root users can break out of the jail very easily.
The idea is that you create a directory tree where you copy or link in all the system files needed for a process to run. You then use the chroot() system call to change the root directory to be at the base of this new tree and start the process running in that chroot’d environment. Since it can’t actually reference paths outside the modified root, it can’t perform operations (read/write etc.) maliciously on those locations. (credit Ben Combee)
First of all let’s look how it done on CentOS, we need to install bind service check that it running and then install bind-chroot.
So first of all I install the bind on my CentOS system.
1
yum install bind
Second, I start named service and checked that is working right.
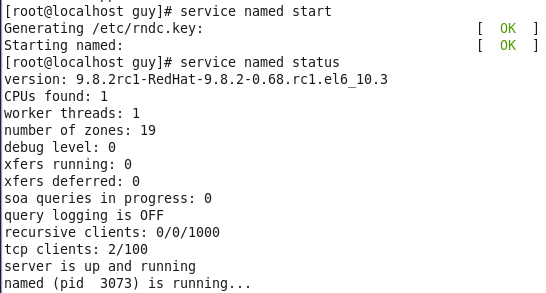 Figure 29 The bind service on CentOS.
You can see that the service is started successfully and the bind service is up and running, now Let’s look on the files location.
 Figure 30 The bind file on CentOS.
We can see that we have file on /etc and also on /var/named directories, now it’s time to install bind-chroot and see what it make on our directory.
You can see that we now have the chroot folder, this folder contain sort of new system enviroment that contain the bind files.
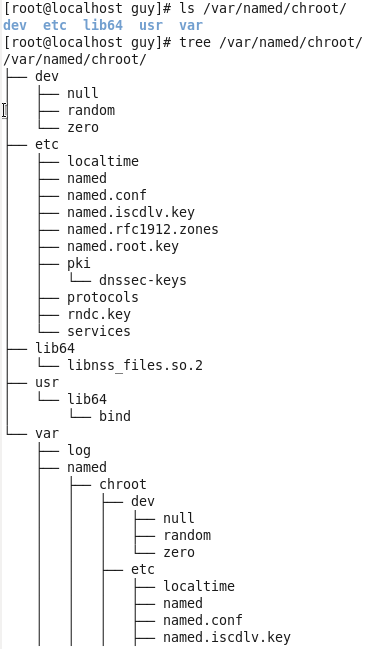 Figure 32 Using the tree command for path tree.
You can see that we have dev, etc, usr and var directories, and every such directory contain files that related to bind, so this force the bind to look on the chroot directory which is isn’t the actually root directory of that system, so this is the jail for bind which is separate that process from the root look system.
On Ubuntu we have what is called App Armor, this App Armor is a Mandatory Access Control (MAC) system which is a kernel (LSM) enhancement to confine programs to a limited set of resources. So we actually not need to worry about bind process, but if we want we can change the directory for Ubuntu to be in jail, it’s more complicated to run bind process on the jail, there is no tool bind-chroot for that so you have two option.
Remove BIND, create the jail root directory and apply their the source code of bind and configure it.
Create jail root directory, under the jail directory we need to create enviroment like we saw on CentOS example, also do some reaserch about BIND files and move or copy them to the jail sub directories, as example, we have two file that contain information about bind, that is the
passwdandgroup, those two file must to be under the jail root directory in the/etc/folder.
 Figure 33 BIND passwd and group information.
There is more files that related to bind like /etc/ld.so.cache and /etc/localtime, so it important to do your research for make jail to bind on your Ubuntu, after that on the /etc/default/bind9 file we need to change the option and add the following: -u bind -t /var/named/<jail_root_name> this going to force the the process to use top level domain (-t option) we setup and use it for the all bind process, all we need now is to restart the service.
Please remember: you don’t have to set the jail on Ubuntu because of the App Armor that do the same purpose in other ways, but you can make a jail and run for one of the two option we saw, you can use that source to apply that.
The following section lines reading are from Snow B.V. book, about DANE.
After having set up DNSSEC for a certain domain, it is possible to make use of DNS Authenticated Named Entities: DANE. In order to understand the advantage of DANE, we need to look at the problem DANE is trying to solve. And this problem involves Certificate Authorities, or CA’s in short.
The problem with CA-dependant encryption solutions lies in the implementation. When visiting a SSL/TLS Encrypted website via HTTPS, the browser software will gladly accept ANY certificate that uses a matching CN value AND is considered as being issued by a valid Certificate Authority. The CN value is dependent on DNS, and luckily we just set up DNSSEC to have some assurence regarding that. But, modern browsers come with over 1000 trusted root certificates. Every certificate being presented to the browser by a webserver, will be validated using these root certificates. If the presented certificate can be correlated to one of the root certificates, the science matches and the browser will not complain. And that’s a problem.
This is where DANE comes in; While depending on the assurance provided by DNSSEC, DNS records are provided with certificate associating information. This mitigates the dependency regarding static root certificates for certain types of SSL/TLS connections. These records have come to be known as TLSA records. As with HTTPS, DANE should be implemented either correctly or better yet not at all. When implemented correctly, DANE will provide added integrity regarding the certificates being used for encryption. By doing so, the confidentiality aspect of the session gets a boost as well. The TLSA Resource Record syntax is described in RFC 6698 sections 2 and 7. An example of a SHA-256 hashed association of a PKIX CA Certificate taken from RFC 6698 looks as follows:
1
2
3
_443._tcp.www.example.com. IN TLSA (
0 0 1 d2abde240d7cd3ee6b4b28c54df034b9
7983a1d16e8a410e4561cb106618e971 )
Each TLSA Resource Record (RR) specifies the following fields in order to create the certificate association: Certificate Usage, Selector, Matching Type and Certificate Association Data.
The Certificate Association Data Field in the example above is represented by the SHA-256 hash string value. The contents of this Data Field are dependent on the values preceding from the previous three RR fields. These three fields are represented by ’0 0 1’ in the example above. We will explain these fields in reverse order. This makes sense if you look at the hash value and then read the values from right to left as ’1 0 0’.
The value ’1’ in the third field from the example above represents the Matching Type field. This field can have a value between ’0’ and ’2’. It specifies whether the Certification Association Data field contents are NOT hashed (value 0), hashed using SHA-256 (value 1) or hashed using SHA-512 (value 2). In the example above, the contents of the Certificate Association Data field represent a SHA-256 hash string.
The second field represented by a ’0’ represents the Selector Field. The TLSA Selectors are represented by either a ’0’ or a ’1’. A field value of ’0’ indicates that the Certificate Association Data field contents are based on a full certificate. A value of ’1’ indicates that the contents of the Certificate Association Data Field are based on the Public Key of a certificate. In the example above, the Selector field indicates that the SHA-256 hash string from the Certificate Association Data field is based on a full certificate.
The first field represented by a ’0’ in the example above represents the Certificate Usage field. This field may hold a value between ’0’ and ’3’. A value of ’0’ (PKIX-TA) specifies that the Certificate Association Data field value is related to a public Certificate Authority from the X.509 tree. A value of ’1’ (PKIX-EE) specifies that the Certificate Association Data field value is related to the certificate on the endpoint you are connecting to, using X.509 validation. A value of ’2’ (DANE-TA) specifies that the Certificate Association Data field value is related to a private CA from the X.509 tree. And a value of ’3’ (DANE-EE) specifies that the Certificate Association Data field value is related to the certificate on the endpoint you are connecting to.
In the example above, the Certificate Usage field indicates that the certificate the SHA-256 string is based on, belongs to a public Certificate Authority from the X.509 tree. Those are the same Certificate authorities that your browser uses. Field values of ’0’, ’1’ or ’2’ still depend on these CA root certificates. The true benefit of TLSA records gets unleashed when DNSSEC is properly configured and using a value of ’3’ as a value for the Certificate Usage Field. Looking back at the very start of the TLSA Resource Record example above, the syntax clearly follows the port._proto col.subject syntax. The TLSA Resource Record always starts with an underscore ’’. Then the service port is defined (443 for HTTPS) and a transport protocol is specified. This can be either tcp, udp, or sctp according to RFC 6698. When generating TLSA records, it is also possible to specify dccp as a transport protocol. RFC 6698 does not explicitly mention dccp though. The subject field usually equals the servername and should match the CN value of the certificate.
It is not mandatory for the LPIC-2 exam to know all these details by heart. But, it is good to have an understanding about the different options and their impact. Just as using a value of ’3’ as the Certificate Usage can have some security advantages, a value of ’0’ as the Matching Type field can result in fragmented DNS replies when complete certificates end up in TLSA Resource Records. The success of security comes with usability.
Chapter 1
Topic 208: HTTP Services.
So in the world of web atop Linux we can use apache server to bring up web server or web page to be available online, first of all it call apache2 for version 2 (in my case version 2.4.18) but I don’t think that is going to change it apache version 3 will release out if any, just like bind9.
Now, there is some different between apache2 on Ubuntu and CentOS, on Ubuntu it called apache2 which is convenient because all the stuff that related to it also called apache2, the service is apache2, the folder for loading the configuration file are /etc/apache2/, so it make it very easy to track all the file that related to apache2 on Ubuntu, In CentOS it called httpd, so the service is httpd, the configuration folder are locate at /etc/httpd/ and so on, so remember that diffrets between the distributions.
So let’s look on Ubuntu how it’s done, first you need to install it, by run sudo apt install apache2, now here’s a tip, if you don’t know the package name you can run apt-cache search <pkg name> and this will print you all the package available related to your dependencies, you can also run grep on that to cut off what you need or expect to see.
After you install apache2 you can start it by run service apache2 start and check it’s status.
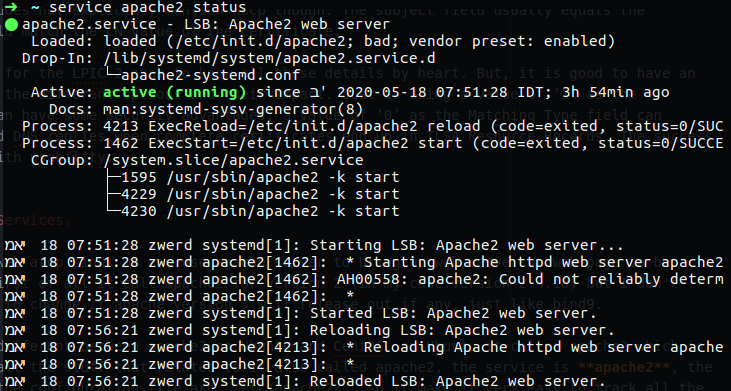 Figure 34 apache2 service status.
In my case you can see that the service is active and running, you also can run apache2 -v which bring you the version, what you may what to see is the configuration file that can be found under /etc/apache2.
We have two folder that called site-available and site-enable, if you going to site-enable folder you will be found some symbolic link to some conf file under site-available, the architecture is built this way so that we can easily enable or disable configuration files from the service.
 Figure 36 The symbolic link to the config file.
If you look on the 000-default.conf you will find line of documentroot which mean this is the directory to load the webpage and render it, by rendering it I mean that the apache2 server take any of HTML file in that folder and rendering it in the way that we can see the page on the browser and view the context without the HTML tags.
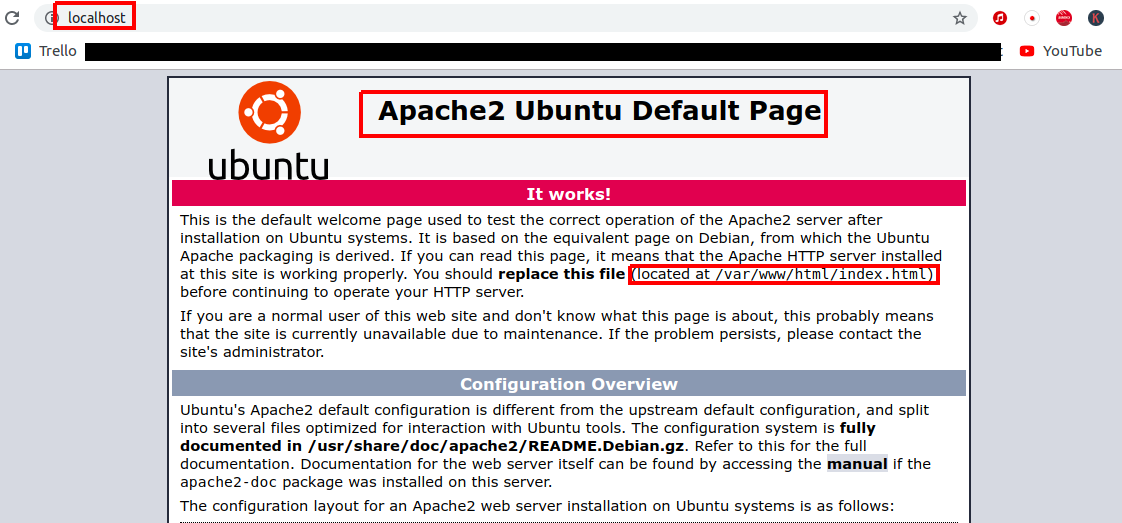
You also can see that the server is localhost, so on the browser we can just type in the URL field the localhost and that will bring us the apache2 default page.
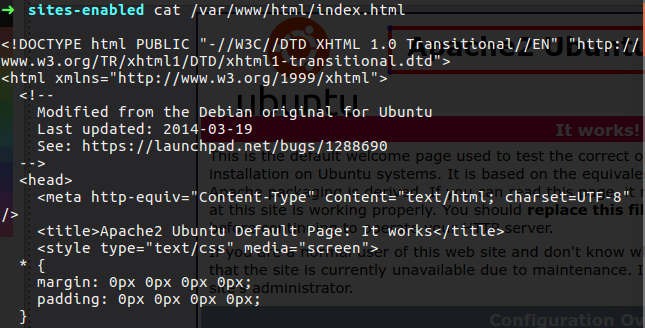
You can see that say that the default page is found under /var/www/html/ ehich is what we saw earlier, if we look on the actual file before the apache render it you can see that it contain the HTML tags.
Let’s look on the pache2 on CentOS, remember that it called httpd service so the same is the status command.
So the files of that httpd service like locate on /etc/httpd, this folder contain the configuration like in apache2 on Ubuntu, please remember that this is the same thing, this is apache2 on CentOS and this is all the differences.
 Figure 41 The files in httpd folder.
The folder that contain the configuration file is the conf.d, this folder is like the one we saw on ubuntu that contain symbolic link to other files, in the CentOS all the files are locate at conf.d folder, you can also look at /etc/httpd/conf/httpd.conf file that contain the include line that tell the apache to load all the file under conf.d folder that ends with .conf string.
 Figure 42 The include line for conf files.
So in the CentOS file if we want to disable some conf file we can just change the extention to be something else and it will not load that config file.
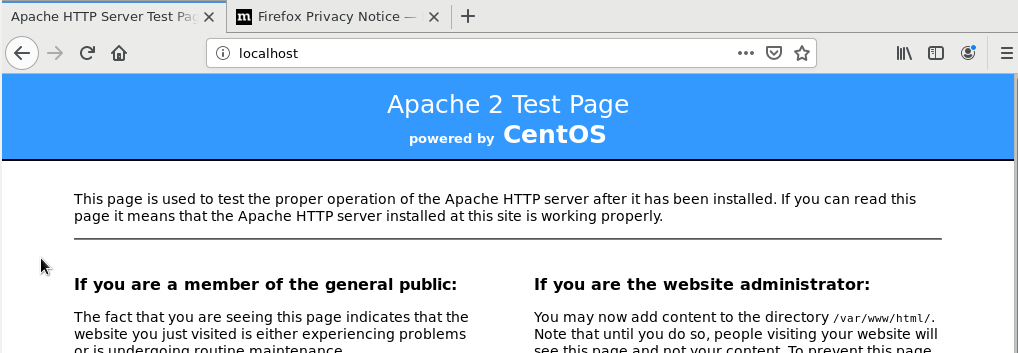 Figure 42-1 The files in httpd folder.
so let’s say I change the welcome.conf to welcome.conf.disable, this will make the apache2 to not load that welcome config file.
If for some reason you can’t change the main configuration for file of apache2 you can use the .htaccess for making your changes, that file contain the subset for apache directives, there is referance in the apache2.conf file as example you can find the line AccessFileName .htaccess which is use for name of the file to look for in each directory for additional configuration directives.
Let’s talk about apache modules processes, we have the way to install some module that can be for example SQL, PHP, PERL ect. every such module can bring us ability that we didn’t have before, just remeber that so far we saw that the apache render some HTML code to be more readable in user browser, but he didn’t know how to manage and read more languages, for example if we bring some PHP code, in the regular way apache don’t know how to render it so it will print out the code on the document, but if we install apache module that support PHP, then the apache will know how to render the PHP code and display it on our browser.
So, on Ubuntu just install the module you need, if it is PHP search for PHP mod and install it
 Figure 43 The PHP mod that I need.
Just run the following command:
1
sudo apt install libapache2-mod-php
After the installation will done you will found two new files on the mods-available folder.
1
2
php7.0.conf
php7.0.load
In the mods-enabled you will see new symbolic link to the available folder that load the configuration of PHP to our apache.
 Figure 43 The symbolic links to PHP files.
You can check PHP version by using php -v and also check if it active a2query -m php7.0, now you can create php code in html folder and see if the browser can read and render it.
1
2
3
4
5
#!/usr/lib/php
<?php
$text = "This is my Hello World!";
echo "<h1>$text</h1>";
?>
If it working you will see it.
 Figure 44 PHP code on the browser.
In the apache world there a working method that called Multi-Processing Modules (MPMs), the way that work is that the apache server contain several processes to allow multiple clients to get information from the apache web server, every process that allow client to connect is a child process. The MPM divides into three main methods.
Prefork, this method is very comatible, which mean that you use it when you need it, for example if you are using the PHP modules you will need to use prefrok because the way it working and allow PHP to work good without some buggy issues, this method uses a lots of RAM so you need to be sure that you set it right for your server will never become out of memory and crash.
Worker, this method is the most used method, this is use threads, this is mean that every child process have a threads that allow clients to connect the web server, the worker need more memory for use.
Event, thismethod are newer one, it also use threads and it handles diffrent type of connection differently.
We need to get know to enable those method, we going to look at the prefork because I am using PHP and prefork used for that case.
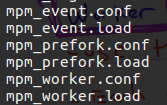
Here on Ubuntu I jump to /etc/apache2/mods-available folder and check what files are in it.
You can see the MPM files, if we check on the enable folder we will see the symbolic link for working MPM method.
So now we know that prefork method are working, if we want we can change the setting of that file.
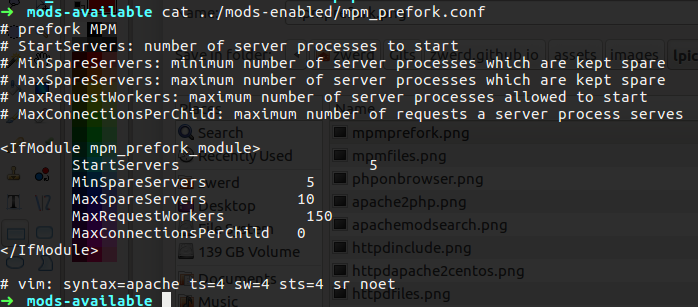 Figure 47 The prefork method settings.
The start server is set to 5, this is mean that when the apache is running, the MPM start 5 child process for handle clients, the MamRequestWorkers mean that this is the maximum allowed connection to that web server, in my case it 150 connections at once, if all the connections close down my server will leave a number of open processes which is in my case between 5 and 10 which are the MinSpareServers and MaxSpareServers.
Please note that the MaxRequest set to handle client request the more request you allow the more memory need so if you set it to 1,000,000, your server can crash so note that you set it for a possible request numbers, if you need more, add up to your machine more memory for it can handle it.
We can setup authentication on our web server, this way will force the clients to type user name and password before that can get access to the website.
To do it we need to tell apache that authentication is required, next we need to create the credential.
If you remember in the sites-enable folder we will find the 000-default.conf file, this file contain the configuration for our server like we saw earlier the root folder is the /var/www/html directory, in that file we also going to setup the authentication, all we need to do is to add new section in that file as follow:
1
2
3
4
5
6
 <Directory "/var/www/html/secret">
  AuthType Basic
  AuthName "Welcome! Type your credential"
  AuthUserFile "/etc/apache2/userpass"
  Require valid-user
 </Directory>
Please note: this Directory section need to be place inside the VirtualHost of your web conf file.
The AuthType is the type of the authentication we going to use which is basic, there is also digest which is implements HTTP Digest Authentication (RFC2617), and provides an alternative to mod_auth_basic where the password is not transmitted as cleartext.
You can see all the mod in the following folder /usr/lib/apache2/modules/, this folder contain several modules for different method that we can use in the 000-default.conf, another example is mod_authz_host that can allow only specific source client to connect our server, like required IP address, or hostnmae etc, also the mod_access_compat that allow us to group authrizations based on hostname or IP address.
 Figure 47-1 The modules we can use.
The AuthName is actually the title of the popup alert the client will have when he trying to connect our site.
The AuthUserFile used for the direct path to the password file, this is the were the password and usernames stored, we can use AuthGroupFile string if we want it to look at file that contain list of user groups for authorization.
The Require is say that only valid user will be allow to get that folder.
For create the password we need to run the htpasswd command as follow:
1
sudo htpasswd -c /etc/apache2/userpass eliot
This will ask from us the password for eliot user and in the end it create the userpass file on the apache2 folder that contain the password we typed.
If you will try to read that file you will found out the this is some ash string. Now we need to use apache2ctl, so run the following command.
1
sudo apache2ctl restart
This is the same like service apache2 restart done, you can also use apachectl that also can used to control the service, we need to create the secret folder and add some html code that only authorize users can get to.
1
2
3
4
mkdir /var/www/html/secret
cd /var/www/html/secret
sudo touch index.html
sudo vim index.html
On that html I place the following lines:
1
2
3
4
5
6
7
8
9
10
11

<!DOCTYPE html>
<html lang="en" dir="ltr">
  <head>
    <meta charset="utf-8">
    <title></title>
  </head>
  <body style="font-size:30px;color:blue;font-family:monospace;">
    What I'm about to tell you is top secret. There's a powerful group of people out there that are secretly running the world. I'm talking about the guys, no one knows about the guys who are invisible. The top 1% of the top 1%. <b>The guys that play God without permission.</b> And now I think they're following me.
  </body>
</html>
If we set all as needed it will work and ask for username and password, so let’s give it a try.
 Figure 50 The Sign In message.
After you type the password you will get access to the secret folder.
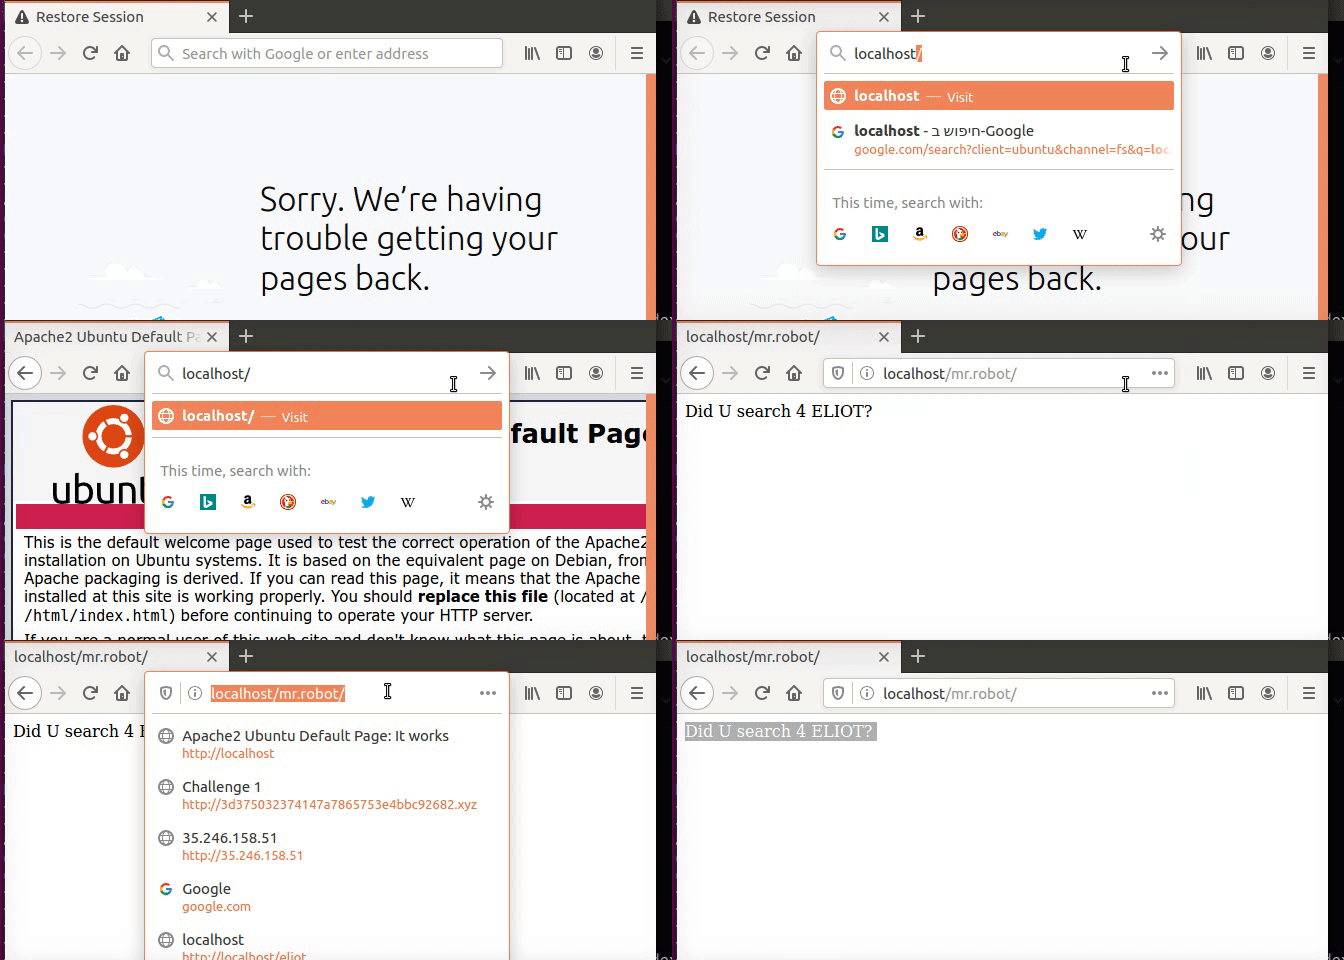
We also can redirect user to other location, as example if someone ask for eliot folder he get mr.robot folder, to do that we just need to add the following line to the default conf file.
1
Redirect /eliot /mr.robot
You can see that I type eliot and it redirect me to mr.robot folder.
We use that redirect in case we change some of the files location or our webserver, so because our users know some location and don’t know about the new location we just set it up and redirect them to the new location of the files.
Let’s say that we want our server to contain several websites, we can do so with apache, there is a several way to accomplish that, we can use virtual hosts, that virtual hosts divided to two options, IP Based and Name Based.
With IP Based we setup to our server several IP address and if the client what to get some of them he get diffrent website from the other one.
With Name Based we setup several name to our server via the apache, so if the client request for that name he get one the page that related to this name, if he rquest for other name he get other webpage, we also can set that if the client didn’t requested for some name he will get the default page.
Let’s look first how to accomplish the IP Based option, we need at first setup several IP address to our machine, we can use ifconfig to do so:
1
sudo ifconfig eth0:0 172.16.60.250
This command will add to our local network interface the 172.16.60.250, please note that I use eth0 here, in my machine the network interface is wlp2s0 so I need to set wlp2s0:0 for my case, you can add more IP address by given other number etc.
 Figure 52 My interface wlp2s0:0.
You can use ip addr command for check that it set correctly. Now we can try to ping it
Now what we need is to make some changes on the default file in the sites-avialble folder, this is the same file we saw earlier for the authentication type, if you look on this file you can see on the top the <VirtualHost *:80> this line specefied the address for that web configuration, so in that case any client that try to connect to some of the IP addresses on our server with port 80 will get this section webpage.
So in that section we can specified new root directory that going to contain the webpage for client that try to connect to one of our IP addresses, for the other IP address we will create new section and specefied there new root directory for that section and this will direct client to this webpage only if thay try to connect to this second IP address.
Let’s say that I want to set two webserver, one is only the specefying IP address, which mean that if the client ask for that IP address webpage he will get my first webpage.
For the second page I will setup it as Name Based option, so only client that ask for that name will get that webserver.
On the /var/www/html/ I created two directory as follow:
1
2
sudo mkdir /var/www/html/webpage1
sudo mkdir /var/www/html/webpage2
On each I set index.html as follow:
1
2
3
4
5
#for web page 1
<h1>Welcome to WebPage1</h1>

#for web page 2
<h1>Welcome to WebPage2</h1>
Now I need to create the file that specified the IP and the file that specified the Name, so I run the following on the apache2 directory.
1
2
sudo cp sites-available/000-default.conf sites-available/ip.conf
sudo cp sites-available/000-default.conf sites-available/name.conf
So now I have the ip.conf file and name.conf file, let’s start with the ip file, on the top of that file I specified that IP address of the section that have the configuration for direct client the root page that locate on webpage1 folder.
So now inside that I need to change the root directory to be the webpage1, so the folowing line is what I change:
1
DocumentRoot /var/www/html/webpage1
I also change the server name for if any client will try to get webpage1 by name convention he will get that section that will give him the webpage1.
1
ServerName webpage1
In the name file we want to make change only in the ServerName line to contain the webpage2, on the VirtualHost we save the name.conf with the * sign for listening to any destination ip address on port 80, and the ServerName is what we need to change.
1
ServerName webpage2
So now we need to enable our setting, for that we need add more symbolic links on the enable folder, but on Ubuntu we can use a2ensite this command can enable sites that we have on the sites-available folder.
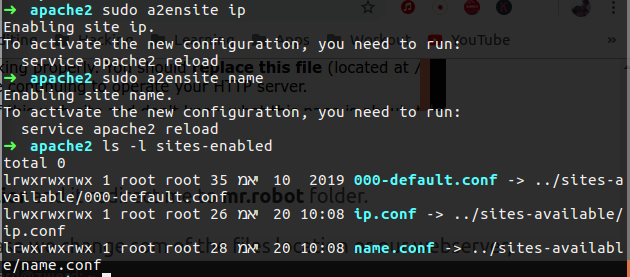 Figure 56 My new enable sites and symbolic link.
You can see that I have new symbolic links on the sites-enable folder, also note that we need to reload the apache2 service for the configuration will take in place.
1
sudo service apache2 reload
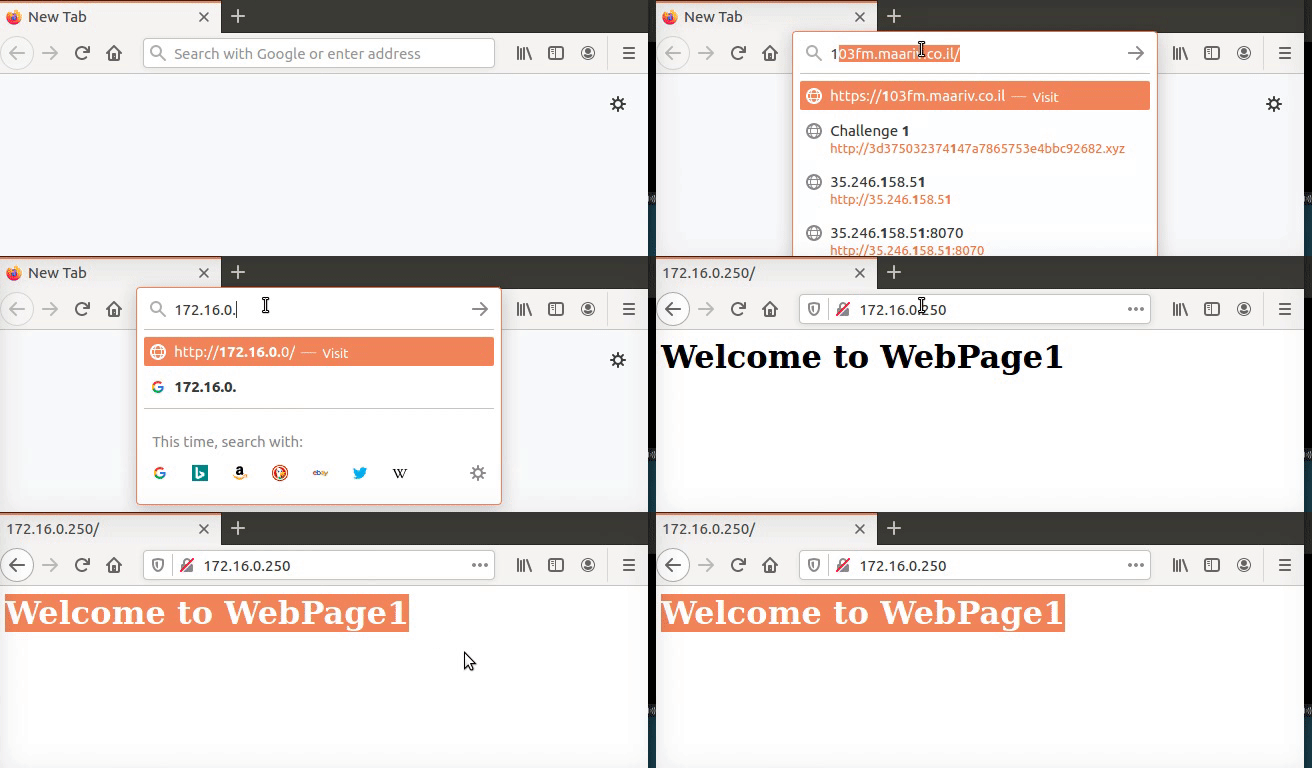 Figure 57 The webpage1 is working.
Please note that for webpage2 we need some new dns record or at least to change the host file for contain thet name because the webpage2 is based on name convention so we must have the way for the client to find out what is the IP address of that name.
 Figure 58 The webpage2 on the hosts file.
So now if I try to ping that I shuld get an answer that contain the 172.16.60.250 address.
 Figure 59 The ping is working.
So now I can test if by typing on my browser the webpage2 will bring me the webpage2 page. Also please note the the default is also not specified any IP address to listen so I change it to listen to 172.16.0.250.
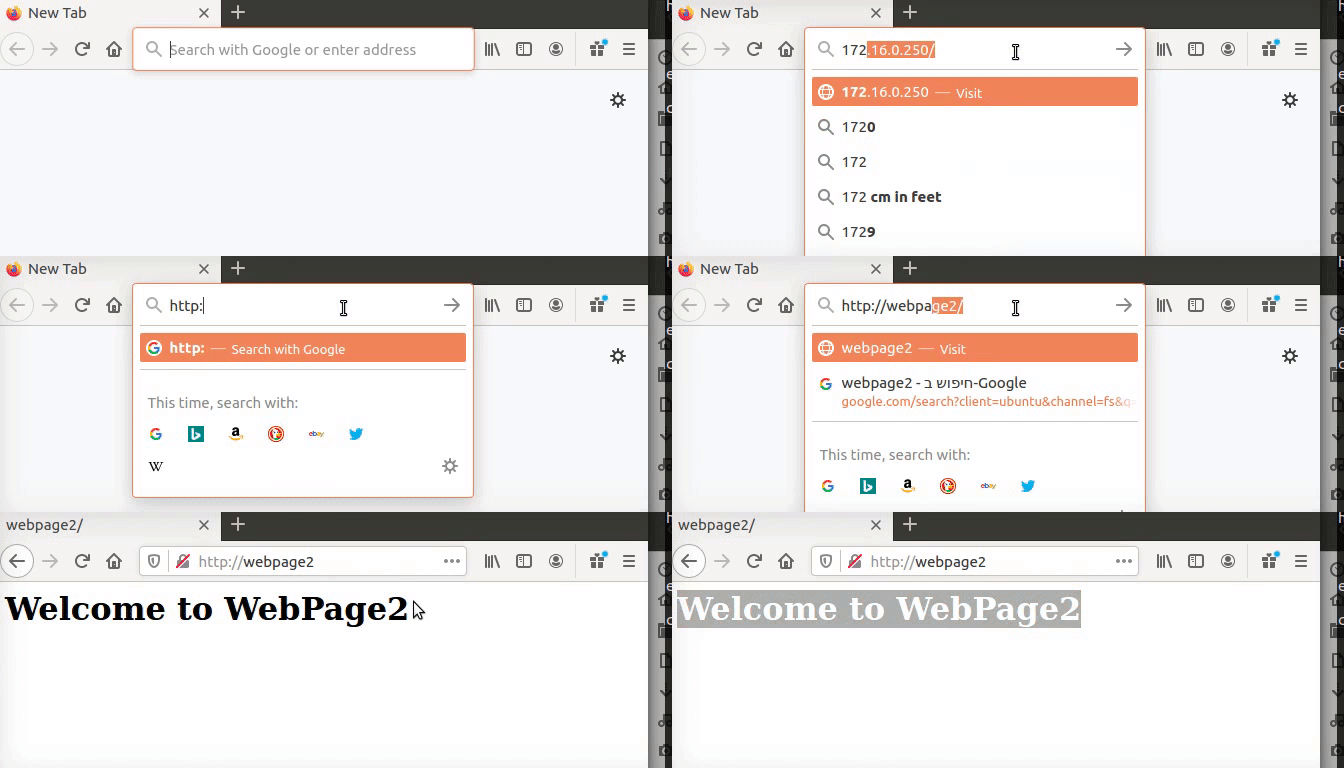 Figure 60 My webpage2 is working.
You can see that I also use http for get to this page, if you didn’t specify http in the URL it’s likely the browser try to use the default search engine with the name you write on the URL bar.
If you have some issue with apache2 you can always check the service status and it may specified the error, if you need more details it a good idea that you check the logs itsef, you can find that on /var/logs/apache2/, that folder contain the access.log file which give you information about every connection that has done on this web server regarding to apache2, and error.log file which give you the error log about apache2 as example if you have some syntax mistyping it will be specified on that log.
If you want to use https which option encryption connection to the server using SSL, you can do so with apache2, but there is more thing that related to that like certificate and the encryption session so let’s look how it work.
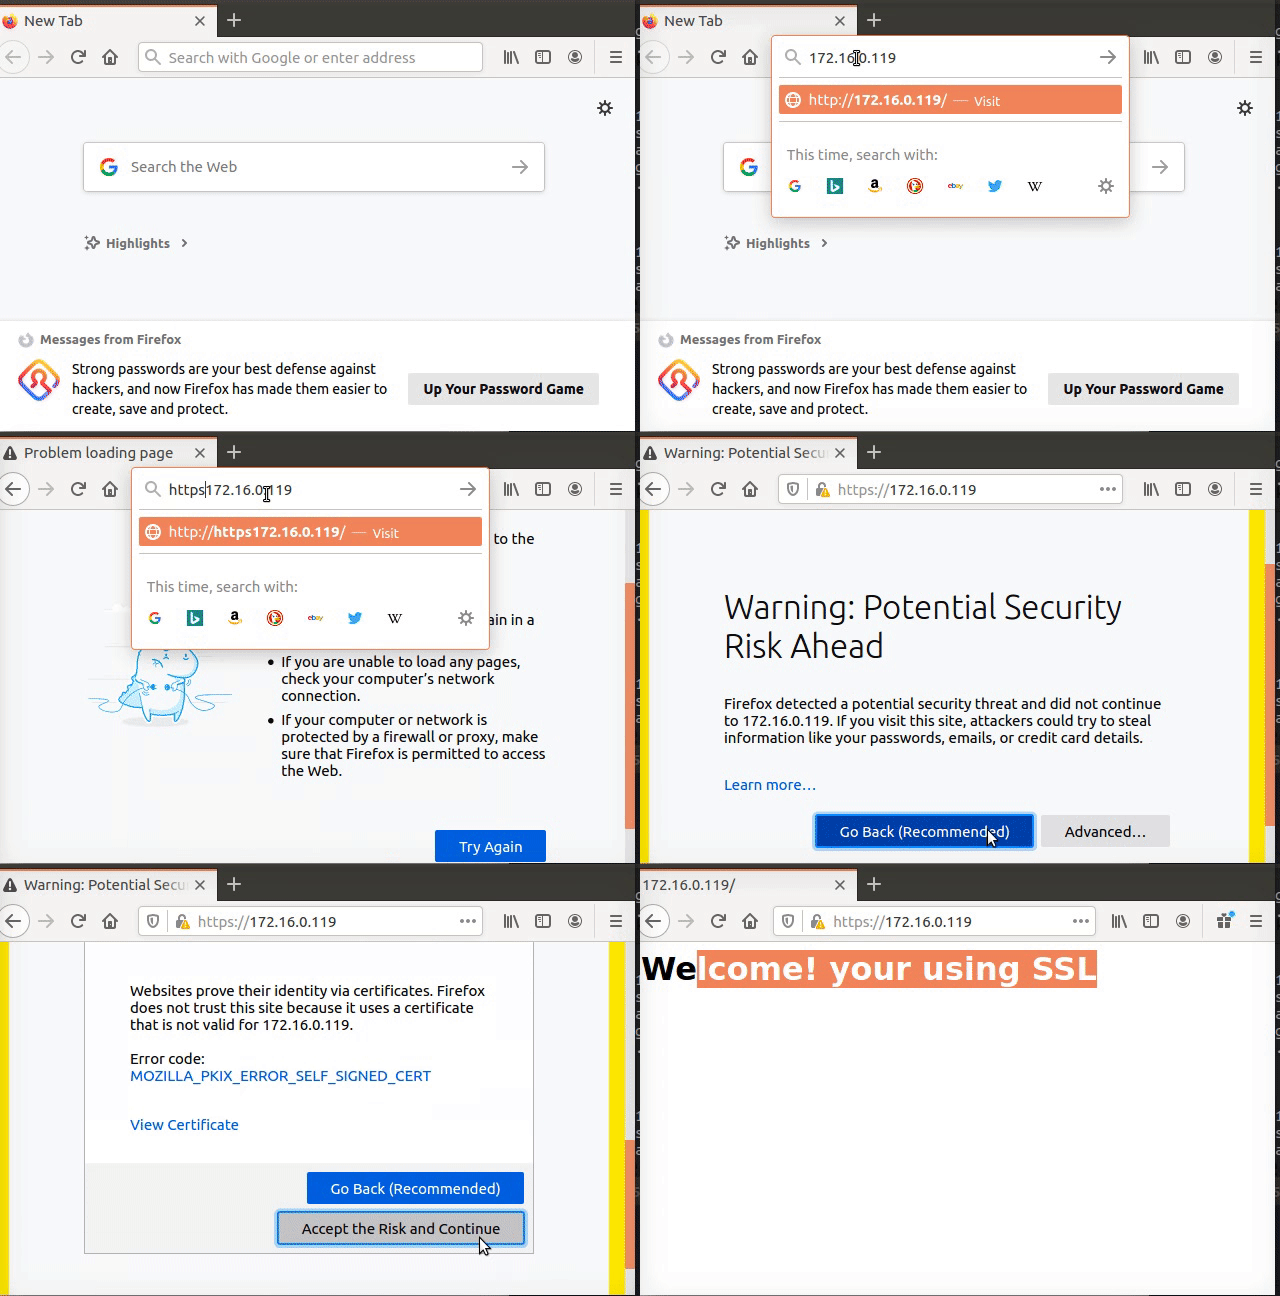
The client trying to connect web server by using https, it actually open SSL connection, at first there is the 3 way hand shake in TCP and then he try to connect using https, the server will give him his public key that sign by some root authority that browser on the client trust, then the server send traffic down the client that encrypted by the server privet key, the browser on the client decrypt that by using the public key, all of that is for deny Man In The Middle attack that act like he is the server and give the client some cert, because the client has the root authority that he trust so in that case we will continue the session only with server that have certificate that sign with the root authority.
In our case we going to setup self-signed certificate and you will see on the client browser that he complain about that certificate, we also going to setup public and private key on our server.
I am useing CentOS, so for install the ssl module we need to run the following:
1
yum search apache | grep ssl
This command will find the module name we need to install.
 Figure 61 The mod_ssl is available for install.
We need to run the following command for install ssl module on the server.
1
yum install mod_ssl
then if you check the httpd folder you will found the the ssl.conf file under conf.d folder, this was created by the mod_ssl package, this file contain the settings for the ssl on the apache2.
So we need to check the following, first the SSLEngine need to be on, this will activate the ssl on our server.
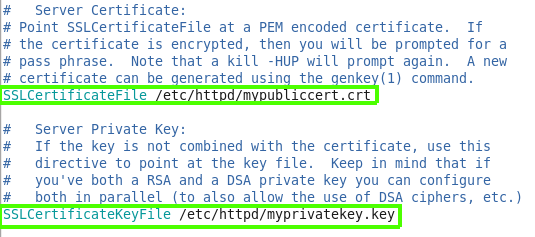
If you scroll down page you also find the certificate sections for the ssl, the server certificate, server private key and server certificate chain.
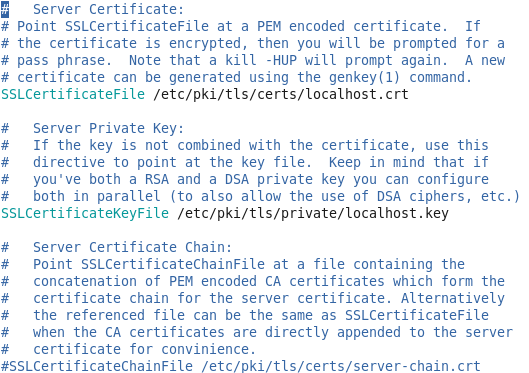 Figure 63 The certificate sections.
So we going to create crt which is the certificate file and specify it’s location on the SSLcertificateFile line, also we going to create privet key and specify it on SSLCertificateKeyFile, in the SSLCertificateChainFile we can specify the in intermediate CA certificate in case we realy want to sign our cert by CA, “intermediate certificate” mean that this is sign certificate by some trusted CA but not the root authority, it just intermediate CA that can sign on our cert, you can read more about that on the dnsimple.
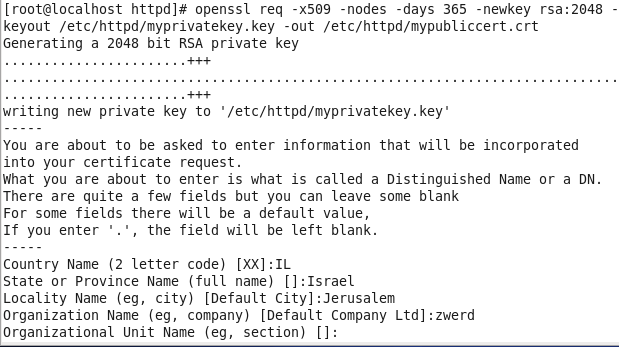 Figure 64 Using openssl for cert creation.
You can see the I run new request for X.509 cert so this is why I am using req option cent, please remember that there are several types of certificates, the X509 certificate comes with a certain structure and that’s what we are going to get out of this command, the -x509 is for the type of our certificate, The option -nodes is not the English word -nodes, but rather is “no DES”. When given as an argument, it means OpenSSL will not encrypt the private key in a PKCS#12 file, credit indiv.
We also setup the time for that cert will be vaild, in my case 365 days, this is new key so this is way -newkey, the type of it encription is RSA 2048 bit, and we specify the key name and cert name, all we need now is to give information on the cert and we done.
You can see that new files was created loclly.
So now we need to make changes on the ssl.conf file and we done.
All we need now is to restart the apache service by using the following
1
service httpd restart
Please remember that certificate that installed as part of your Linux distributions are usually installed on /etc/ssl Debian based or /etc/pki Red Hat based.
Before we trying to connect the web server, we need to create the html page, in my case on CentOS this need to locate at /var/www/html/index.html.
You can see that the browser is complain about the connection because the certificate is not sign by root authority server, but still the traffic is encrypted.
There is more settings that we can do regards to ssl.
SSLCACertificateFile This directive sets the all-in-one file where you can assemble the certificates of Certification Au- thorities (CA) whose clients you deal with. These are used for Client Authentication. Such a file is simply the concatenation of the various PEM-encoded certificate files, in order of preference.
SSLCACertificatePath Sets the directory where you keep the certificates of Certification Authorities (CAs) whose clients you deal with. These are used to verify the client certificate on Client Authentication.
SSLCipherSuite This complex directive uses a colon-separated cipher-spec string consisting of OpenSSL cipher specifica- tions to configure the Cipher Suite the client is permitted to negotiate in the SSL handshake phase. Notice that this directive can be used both in per-server and per-directory context. In per-server context it applies to the standard SSL handshake when a connection is established. In per-directory context it forces a SSL renegotiation with the reconfigured Cipher Suite after the HTTP request was read but before the HTTP response is sent.
SSLProtocol This directive can be used to control the SSL protocol flavors mod_ssl should use when establishing its server environment. Clients then can only connect with one of the provided protocols.
ServerSignature The ServerSignature directive allows the configuration of a trailing footer line under server-generated documents (error messages, mod_proxy ftp directory listings, mod_info output, …). The reason why you would want to enable such a footer line is that in a chain of proxies, the user often has no possibility to tell which of the chained servers actually produced a returned error message.
ServerTokens This directive controls whether the Server response header field which is sent back to clients includes minimal information, everything worth mentioning or somewhere in between. By default, the ServerTokens directive is set to Full. By declaring this (global) directive and setting it to Prod, the supplied information will be reduced to the bare minimum. During the first chapter of this subject the necessity for compiling Apache from source is mentioned. Modifying the Apache Server response header field values could be a scenario that requires modification of source code. This could very well be part of a server hardening process. As a result, the Apache server could provide different values as response header fields.
TraceEnable This directive overrides the behavior of TRACE for both the core server and mod_proxy. The default Tra ceEnable on permits TRACE requests per RFC 2616, which disallows any request body to accompany the request. TraceEnable off causes the core server and mod_proxy to return a 405 (method not allowed) error to the client. There is also the non-compliant setting extended which will allow message bodies to accompany the trace requests. This setting should only be used for debugging purposes. Despite what a security scan may say, the TRACE method is part of the HTTP/1.1 RFC 2616 specification and should therefore not be disabled without a specific reason.
For the LPIC2 202 we need also know how proxy work, proxy server is some middle server between us and the internet, by using proxy server every connection that related to web, is going through the proxy server, there is several reasons why to use proxy, the first one is that proxy server can cache webpages on local memory, so it’s mean that if someone on the organization want to get zwerd.com web pages, the proxy server will save these pages on it’s local memory and disk, if other person want to get the same information we will get it more fast because there is that data cache on the proxy server, the second reason is security, when connecting to some site, that site can contain some JavaScript or PHP code that can harm your system, the proxy server can contain some smart implementation that check on the application level every code that will run on our clients can block if found any malicious file or code, on LPIC2 202 we just need to get know Squid proxy server which bring the first reason why to use proxy, but remember that there is more other proxies solutions our there that considered the security issue and trying to solve it.
I am using ubuntu so for install Squid I just need to run the following:
1
sudo apt install squid
This is just metadata for squid, you can run squid3 which will install the squid3 version, but in the most of distros the Squid are in version 3 is it’s doesn’t really matter.
There is two settings that we can see on Squid, the first one is cache_mem, this is how much RAM to use for cache, just like that cache on your PC, the Squid do the same with the data he gets regards to queries, the second is cache_dir, this is the directories we cache on the disk, mean how much disk space to use for cache.
We can find these settings on the conf file of Squid.
The errorpage.css is the style for the error page we get from the local proxy, the squid.conf contain the settings we need to look at, this file contain meny settings and explanation, you can type /cache_mem on vim to find it more quickly.
You can see that by default the cache going to use 256MB of RAM for cache pages, so if we uncomment this line this will stay the default 256MB for use RAM.
you also have the following line.  Figure 69 the max size for objects in squid settings.
This line set the maximum memory in cache that one object can observe which in my case is 512 KB of RAM for single thing,
For file cache on the disk we need to search for cache_dir which contain the settings for max cache memory on the disk, just remember that is several types of “store type” which is the file type cache, the most known is the ufs store type, there is more store file like disk-d or rock store, but for LPIC2 we need to know about the ufs type and that this is the default store file.  Figure 70 the max size for disk cache in squid settings.
Please note that the default is not to store disk cache and store it only on memory, so we want to uncomment that line, we also can see that uft store type are in use, we stay it that way because it work, then the path to the store location, the first number is the maximum in MB to store on the disk, so in my case is 100MB, the next number is the how much folders can be created so it 16, and the last number is the sub-folders number which you can see is 256 folders, and all inside this one folder /var/spool/squid3.
After you finish your changes you need to restart the squid service.
1
sudo service squid3 restart
Now we need to test it out, so we can run our browser and set it to use local proxy, this is mean that every communication that we going to create throght the internet going to be using our proxy server.
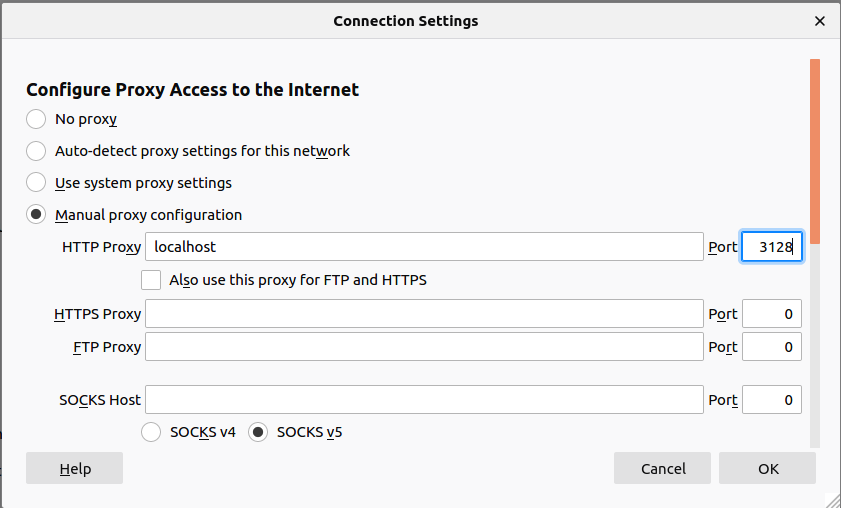 Figure 71 The proxy settings on the browser.
So I set the localhost to be the proxy server with port 3128 which the default port of squid,
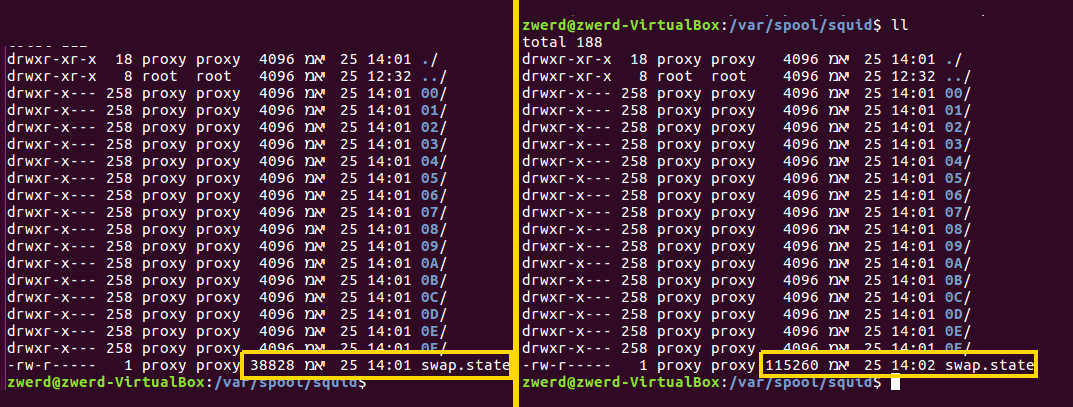
Now I run to zwerd.com and check the before/after size file in the squid store files, you can see the differences.
You also can see that there is 16 folders, if we try to look inside one of them we will find 256 folders, each. So far we saw the cache on squid, but squid can do more stuff, like setup some acl to deny or allow access to someone, the way the ACL on squid work is not so different from the ACL that exist on the networking world.
The ACL on squid is devided into two parts, the ACL elements and Access List.
On the ACL Elements we based our rule on the source IP or destination IP, domain, time in day or port, the Access List itself contain option like http_access that used for allow or deny the specified connection, always_direct that direct connection to the direct site or log_access that record or unrecorded logs about particular connection.
The settings for all of that can be found on the squid.conf, you need to search for TAG: acl to find that section more quickly.
there is several example that are build in the squid by default so let’s look on that.
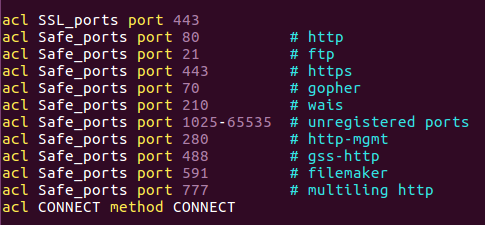 Figure 73 The ACL that come build in.
You can see that we have SSL_Ports this is the name for that acl, this acl catch every connection on port 443, please note that we doesn’t do any action on that list, we just specefying what we want to catch and after that we set the action for each of that list ACL names.
You can also see the Safe_ports ACL name that contain several port in each line like 80,21,443,70… so the action we will done on that ACL will be apply on every connection that use one of the ports listed.
Now, if you scroll down on the conf file you will find the action section for your ACL.
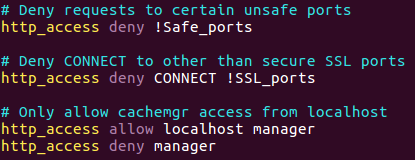
You can see that the Safe_ports set on deny, but please note that there is an exclamation mark ! before the ACL name so it’s mean that every connection that doesn’t specified on that ACL going to deny, down below you can see some deny action for CONNECT and !SSL_ports so that mean that every connection that catch on the CONNECT and does not catch on SSL_ports going to deny.
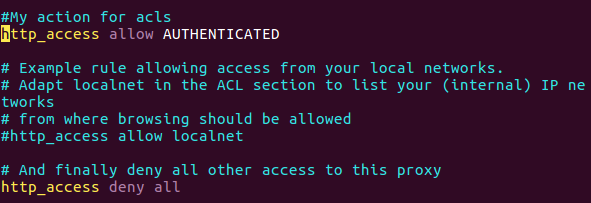
Down you will find the following line:  Figure 75 The last ACL.
1
http_access deny all
This line mean that all the other traffic that didn’t specified will deny, so if we want to add more rule action we need to place it before that line.
Also you can see that there is allow on localhost, this is specefied every connection on local host so if I want that my changes take place I need to locate it before that line.
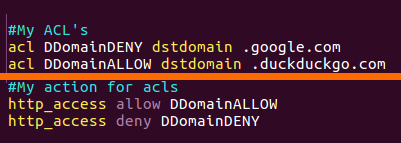
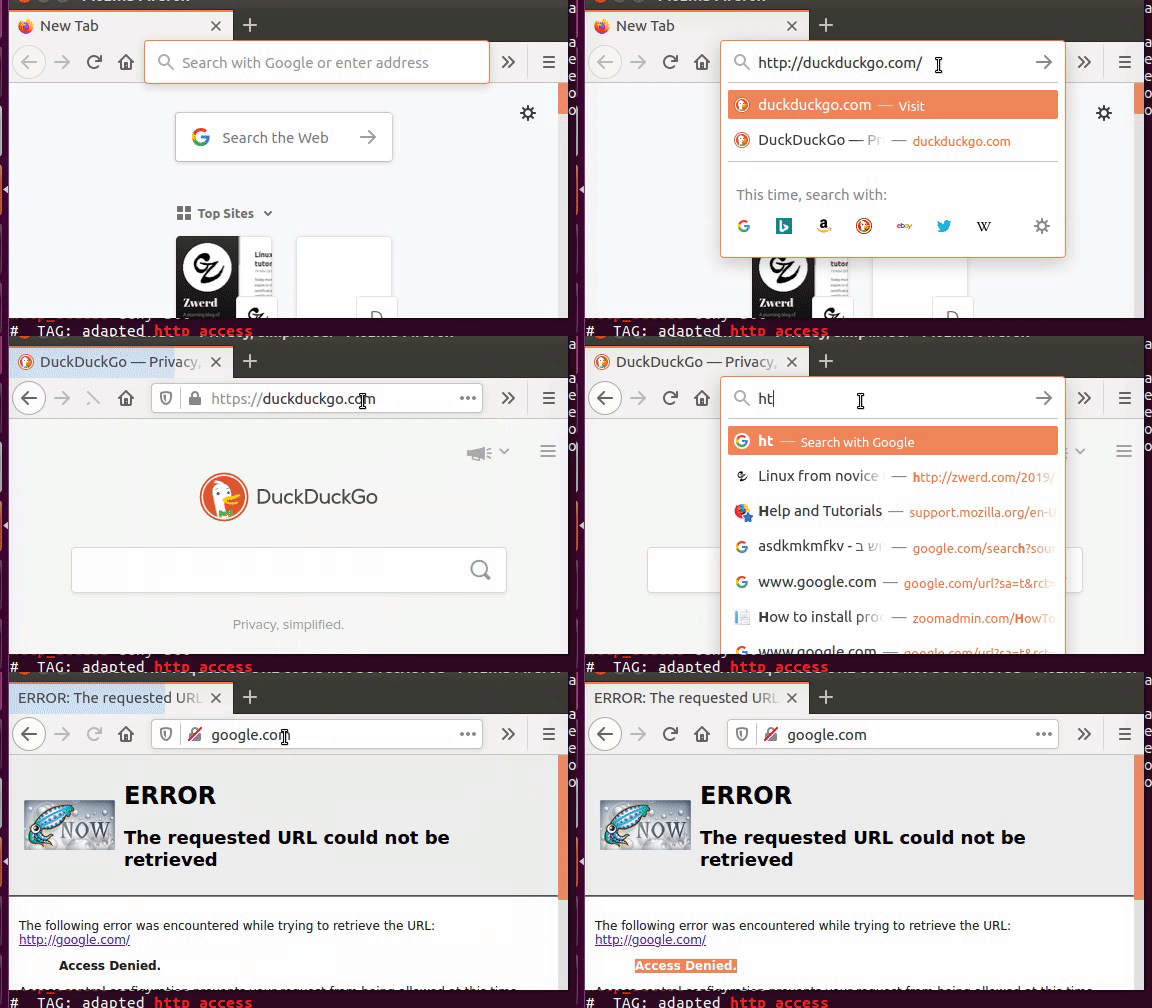
So in my access list every client that try to get google will denay, but if he try to get duckduckgo.com it will work.
Please note that I use port 80 over http (not https which is SSL on port 443) because there is a rule that allow such port.
There is a way to setup some ACL base on authentication, this is mean that the user need to type some username and password and if this user and password match to the list the client allow to connect the site.
To do so we need to set the auth_param, this also can be found on the squid.conf file. By searching for that section it reavile that the default authentication is none so we need to setup it, the line we going to add is as follow:
1
auth_param basic program /usr/lib/squid/basic_ncsa_auth /etc/squid/password
The auth_param is what we going to setup the authentication, so this reference fo r th authentication settings, the basic is the dialog box that going to popup to the client screen and requerd the username and password for check that over the list. the program is the program we going to specefied to use for the authentication, please note that ncsa is the same type of password that we use for password protecting folder in apache, we can use others program but that is very simple one that I am going to use for the example here, the last path directory specified the file that contain the passwords, squid need to know where it store to compare clients typing to this file.
 Figure 78 My auth_param line in squid.conf file.
Please note that ncsa program store on different location in other distros, so you can search them by using find to see where it locate and specified that on the squid.conf file, you can also run locate if the database are update (if not just run before updatedb).  Figure 79 The ncsa file location.
So it locate at the /usr/lib/squid/, you can see that this folder contain more authentication program that we can use if we want. We also need to create the password file we specified on the squid.conf file.
1
sudo htpasswd -c /etc/squid/password zwerd
This command going to ask us for password, the output is that file name we specified in that command. Please note that this htpasswd is part of apache2-utils.  Figure 80 Creating the password file using htpasswd.
You can see that it ask for retype the password for zwerd and that this file is contain the hash of that password.
Now, the last thing we need is to add the ACL that used as reference for the authentication, so let’s open the squid.conf file angin and adding new line on the ACL section.
1
2
acl AUTHENTICATED proxy_auth REQUIRED
http_access allow AUTHENTICATED
 Figure 81 Proxy authentication settings in acl.
You can see that I remove the last line I setup before and remove the allow one, all I left is the deny all and my authentication allow line.
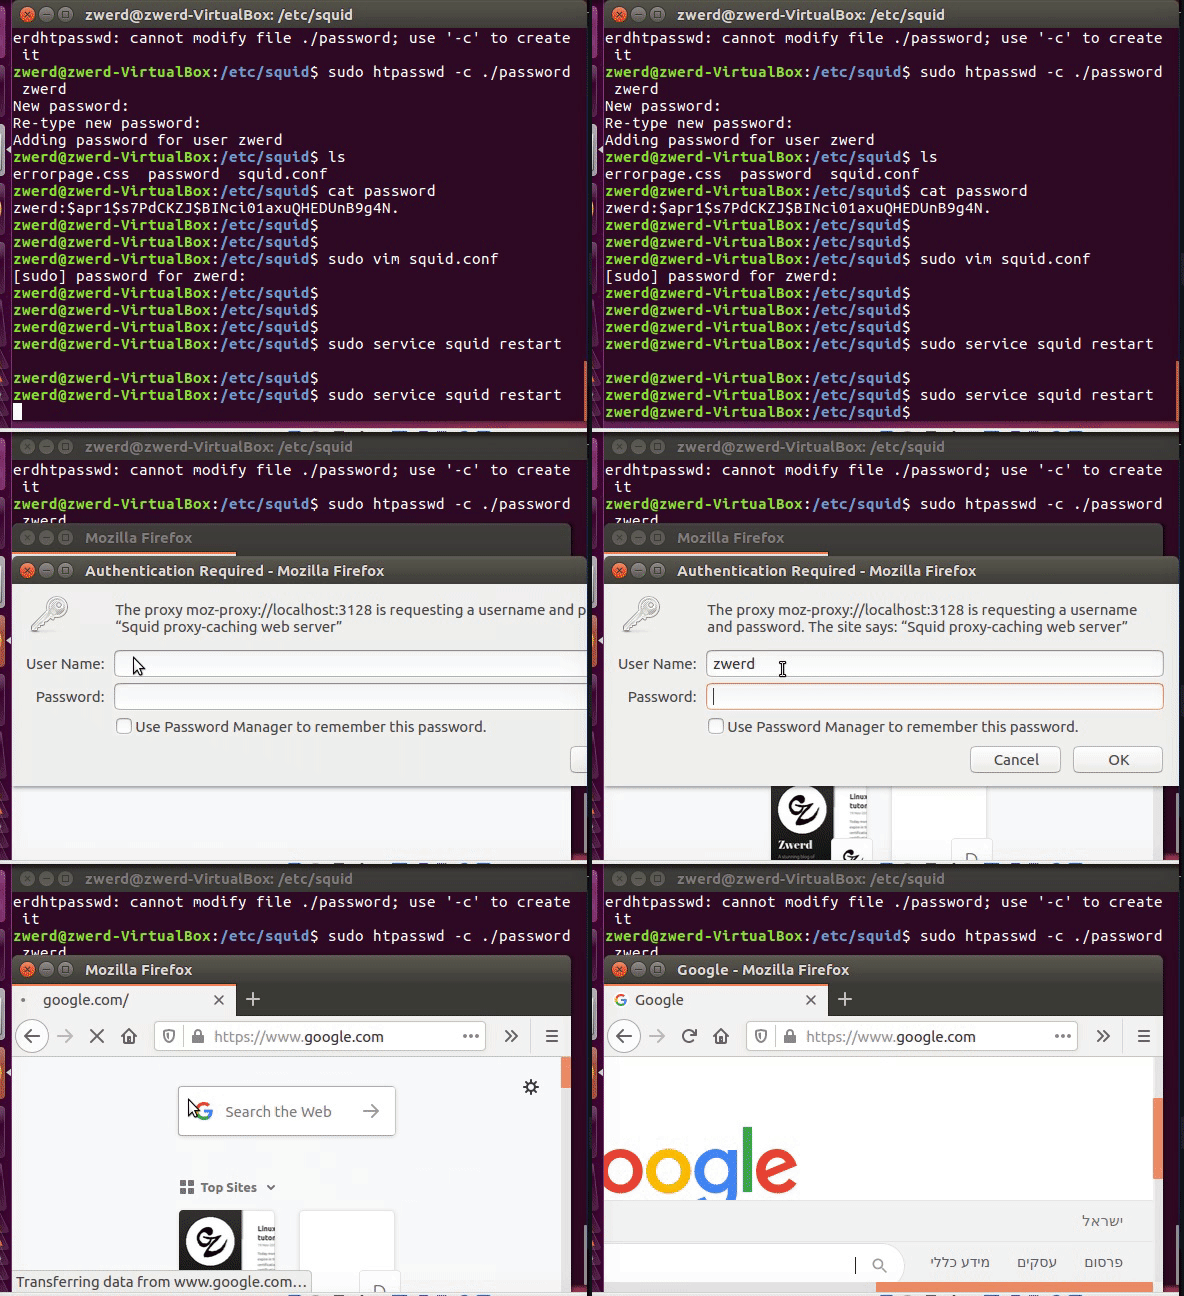
This is time to check if it working right, what I expect to see is that the authentication is required, please don’t forget to restart the squid service.
You can see that I get the popup dialog that asking for usename and password right away that I open my browser, this is mean that our mission is accomplish.
Now, for LPIC2 202 exam we need to be familiar with Nginx, so far we saw the proxy server and how to use it by using squid, the nginx is no different except that proxy is used as reverse proxy.
Please note the diffrent, normal proxy is the server who control the traffic of client from the LAN to the WAN or Wide World Network, so it we can apply on that some ACL to allow or deny any trafic that go through that server, with reverse proxy the picture is the opposite of what we have seen so far, the client are in the WAN, and we have some server on our network that we bring online on the web and we need to give clients from the WAN a way to connect our server.
So you may think for your self that easy, we just need to get some public IP address for the web and that it.
But let’s say that we have more then one server that we need to bring it online, in that case we can use NAT or NAT/PAT that our external router going to observed and direct client from the WAN to our servers.
Reverse proxy work less or more the same way, it also have the ability to take connection base on name, so let’s say that client want to get hack.me site, and he write https://hack.me on the browser, we can give it the zwerd.com site and the client will never note that, so he think that it connected to the hack.me site when it actually connect to zwerd.com.
So let’s say how to setup and configure nginx, it look like apache2 on his configuration way but there is some differences on the syntax.
1
sudo apt install nginx
We just run that command and it will also configure all the stuff we need, so in the end of that we can open browser and see that it connected to the nginx machine.
 Figure 84 The nginx default page.
The nginx location for that page can found /share/nginx/html/, please note that this diffrent then apache2 /var/www/html/.
If you check the /etc/nginx/ folder, you will find several things that look like the same in apache2, the sites-available and sites-enable that can be use to contain the configuration for sites, also you can find the nginx.conf file that contain the configurations.
In the nginx.conf we can see that there is a reference to read all the configuration file in the conf.d folder and also the sites-enable.
 Figure 85 The nginx default page.
On the sites-enable folder we have the default file that contain default configuration and we can lean from it the correct syntax for the nginx.
So, nginx is look like apache2, it have several things that make it more fast than apache2, but apache2 have more abilities that nginx haven’t.
Let’s look how it’s work, we going to setup some configuration that point out to https://zwerd.github.io for anyone who try to get the https://hack.me, this is mean that the client will get zwerd.com instad of hack.me.
first lest set the hack.me locally in the host file.
 Figure 86 You can see that the local ip address is set for hack.me.
So this is mean that every one who trying to get hack.me will get our local server.
Now what we need to do is to set new configuration file for hack.me, on that configuration file we need to include the proxy_params for that setup will work well, we need to create our new configuration in sites-avilable and enable it by create symbolic link on sites-enable, the configuration file need to contain the following:
1
2
3
4
5
6
7
8
9
server {
      listen 80;
      server name hack.me;

      location / {
                  proxy_pass https://zwerd.com;
                  include /etc/nginx/proxy_params;
      }
 }
We set the server for listen to port 80, if there is any request to hack.me, the action would be the location section which contain the / (root) location for hack.me and give the client zwerd.com site, we also include the proxy_params, dont forgate the curly brackets at the end of the section.
Now we need to create symbolic link to the sites-available.
1
ln -s ../sites-available/hack.me
Please note that I run that command inside of sites-enable folder, now all we need to do is to restart the service and check if connection to hack.me actually give as the zwerd.com.
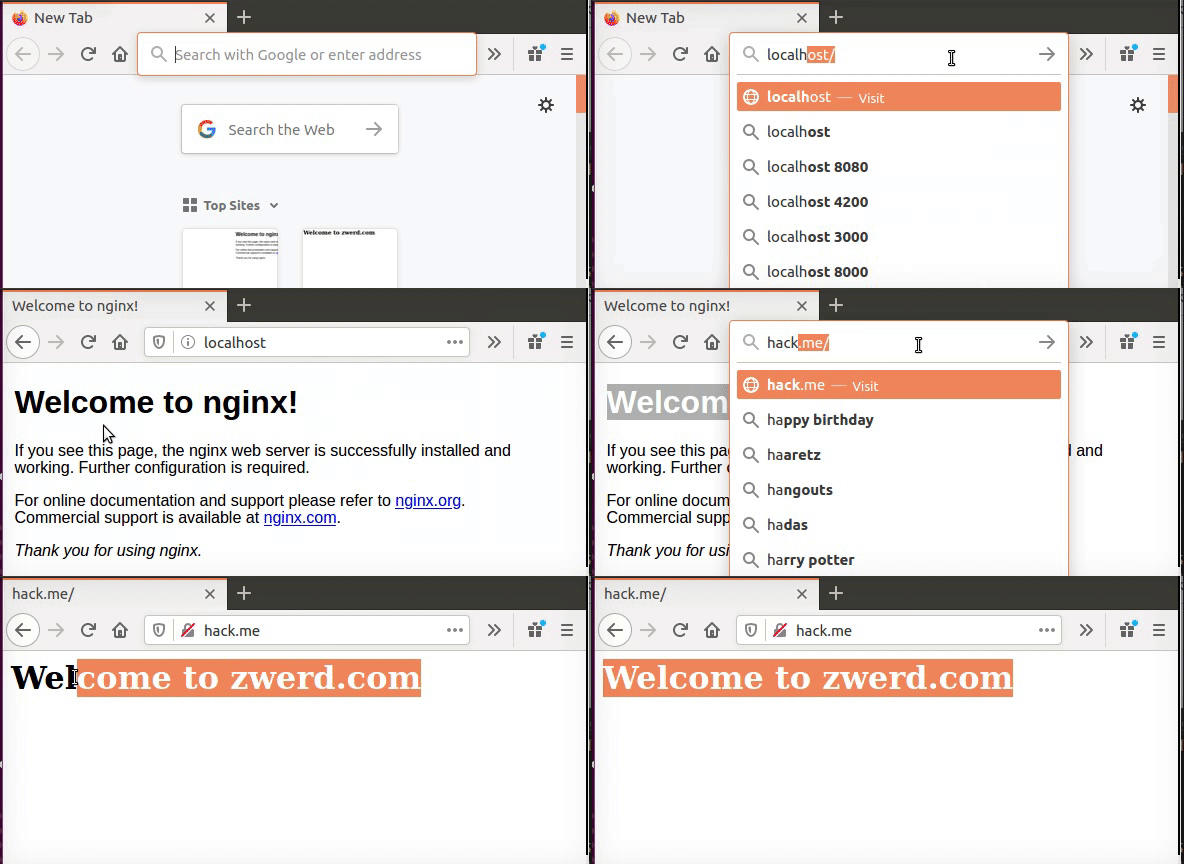 Figure 88 Web connection to hack.me which is zwerd.com.
Please note that if you try that on your lab you can’t direct connection to my zwerd.com actual site, or youtube site or yahoo site, they disable such request because of the proxy_params, so you need to check the params for it to work right, in my example I set up the zwerd.com site locally, also note that the browser use this nginx proxy without or with port 80, this is not like squid that use 3128 port.
Chapter 2
Topic 209: File Sharing.
For the File Sharing part we should have be able to set up a Samba server for various client, by various I think that mean that our Samba server should have a way to get Linux and Windows client to connect our server using SMB.
Samba Daemons is actually the windows server daemon that allow Linux server interact in the windows enviroment, when we talk about samba we need to know that there is two part of that, nmbd which is the name resolution for that file sharing, the smbd used for the actual file sharing, now please remember that smbd is daemon, there is also smbclient and this is just the client sort of agent that allow clients interact with file sharing server.
All we need to know is that if we have some network that are windows environment, we can setup some Linux server working with samba for file sharing, in that way the windows client will never know that this Linux samba server is actually Linux, and they can use the network share on that server for saving file and creating folder and do other stuff the same way they can do on windows file share server, also note that there is service called winbindd which is Name Service Switch daemon for resolving names from NT servers, this service provided by winbindd is called winbind and can be used to resolve user and group information from a Windows NT server. The service can also provide authentication services via an associated PAM module.
So, nmbd is using for finding the name share for file share server, this is like NetBIOS was work for finding the name of the local server that contain file sharing, we can use nmblookup for finding local server that serve file sharing and use nmb daemon on the local network, just remember that on modern network we can do just that by using DNS, but for the exam we need to know about nmbd.
Now, we can as clients to lookup for local sharing file server, we need to run nmblookup and we can find server interesting information.
 Figure 89 My NetBIOS query by using nmblookup.
You can see that I running query to find all the server that are in the working group named WORKGROUP, it find me serveral server, I can now run -S for status information of each server.
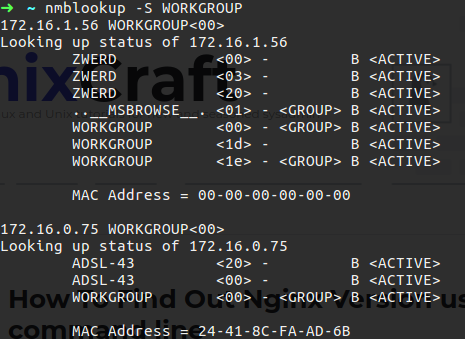 Figure 90 The status information of servers in WORKGROUP.
The first on the list is my ZWERD machine that I use a lot, the ZWERD is the name of that machine, the other machine is 172.16.0.75 that contain the name ADSL-43, we also can see it’s MAC address.
Please remember that this is not DNS lookup, it’s NetBIOS lookup that the nmb search on the network.
When we talk about security in samba world there is two levels, the USER level and the SHARE level, with USER level the client need to supply the username and the password, with SHARE level the client need to supply only password, the server will check if the password is match to one of the users it’s have on the list and if match was found he will allow the connection for that client.
For install the samba we need to run the foolowing:
1
sudo apt install samba
This will download the package and install it, the configuration file are locate as /etc/samba, the main configuration file is the smb.conf file.
In that file you can find the workgroup for the server, in my case is WORKGROUP as we saw earlier, the server string is just the description, you can see that %h which is the local host name of the machine.
These two are in the [global] section, which sort of share point configuration.
 Figure 91 You can see the global configuration for smb.
If we want that windows client will be able to see our samba server we nned to uncomment the win support = yes, this line will allow them to see the name of that samba server and interact with.
You can see down below the path for the log file and the max log size configuration.
 Figure 92 The smb log file location.
For setting the share definition we need to add new section and we do that bellow Share Definitions part on that configuration file.
1
2
3
4
[public]
  path = /public
  guest ok = yes
  read only = no
This section mean that this is public point with going to contain the public folder that going to be share on the local network, the guest mean that it not requires any authentication at all, and also it not read only.
After that we need to create that folder and make it accessible for any one.
1
2
3
sudo mkdir /public
sudo chmod 777 /public/
sudo service smbd restart
After that, if we search it on the local network we should be able to find it.
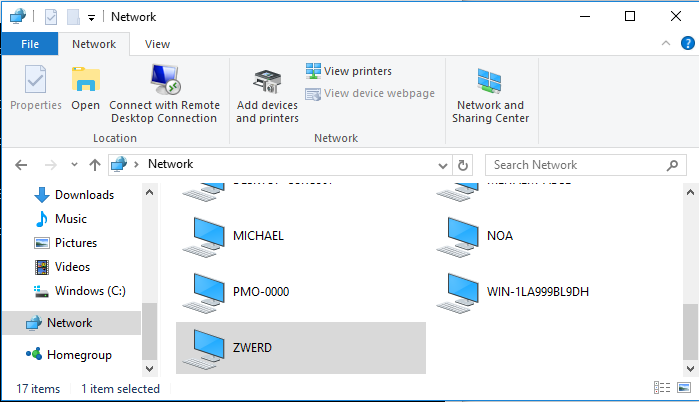 Figure 93 The smb share public folder.
We can connect to that folder and create file and subfolders, this is without authentication, we can run nmbstatus to see the clients that connect to our machine.
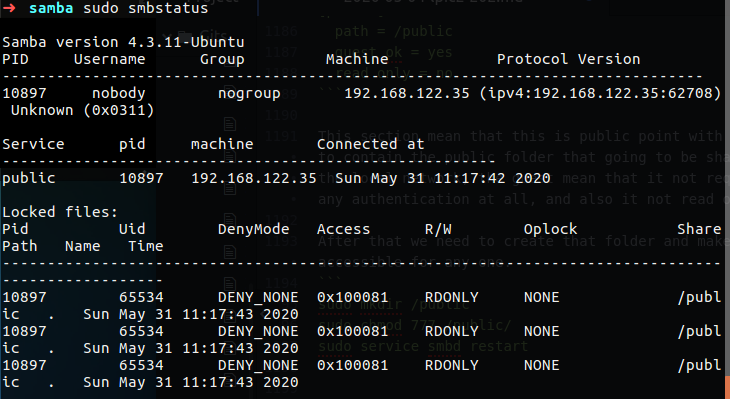 Figure 94 The smbstatus command.
Please note that you see some client that connect with IP that not on my subnet, this is because I connect my machine to other network so my IP was change of curse.
So you can see there is no username and no group name, we can also run net command for see that clients connections.
Again, the IP address is the windows client you saw on figure 93, if you have some issue and the service not bring up you can run the testparam that can test the configuration file for you and display it on the cli.
By pressing enter it dump all the configuration out and tell you if the configuration file that are correct syntax.
You need to know that windows and Linux use different algorithm to store password, so if we try to connect to windows machine the machine will not allow that connection because although the password are correct it send out encrypted and the string check against the passwords store strings that are different from the string on Linux machine, so for solving it Linux store two different password strings.
On the conf file we going to setup the following:
1
netbios name = PINGO
This for see the changing the name for our machine, if you look on the authentication part of that conf file there is several thing that we need to know.
passdb backend, this is the method for encryption we going to use, in my case is tdbsam.
obey pam restrictions, the pam stand for pluggable authentication module, this line say that when the password change use the same requirement that the Linux does, In my case it set on yes because we want to save them sync, which will bring us to the line below.
unix password sync, this line mean that if the SMB change password on the local machine do we want to change also the unix password which is the samba password, so in my case it’s yes, because every time password for SMB change I need it to also change the samba password, down below we can find the opposite.
pam password change, this is mean when the pluggable authentication module are change do we want to change the samba password as well, so In my case is yes.
So all of that configuration will make two type of password, one for samba database and one for system Linux database.
We need to create use for using in our last share.
1
2
3
4
5
6
[data]
  path = /data
  valid users = guyz
  read only = no
  create mask = 0777
  directory mask = 0777
Now we need to create that folder and create that user and password.
1
2
3
4
sudo mkdir /data
sudo chmod 777 /data/
sudo service smbd restart
sudo smbpasswd -a guyz
By using smbpasswd -a it adding new user, you can see that he ask for password, this is the password the client need to type for connect this share folder.
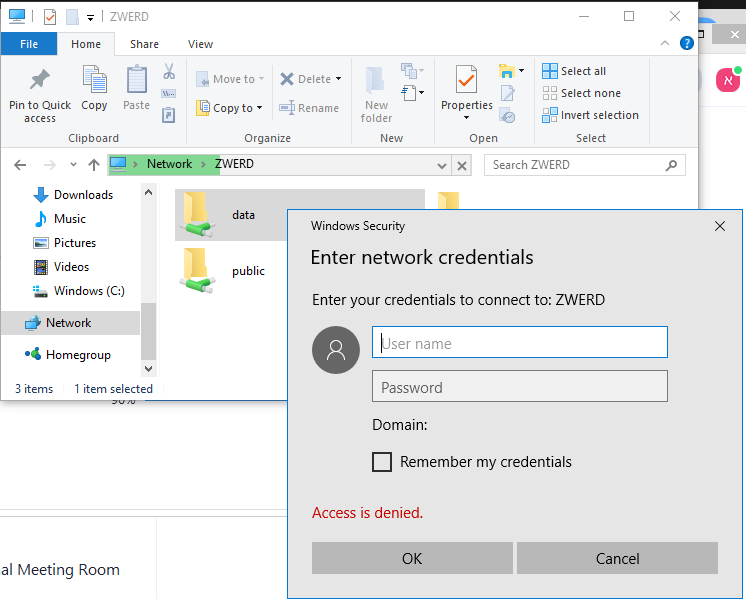 Figure 97 Asking for password.
Please remember that with samba we just share some file or folder and that can be with security level or not, depending our configuration.
There is more tool that you can use which is smbcontrol, in case you need to run some script to manipulate the smbd or nmbd you can use this tool in your script, with smbcontrol you can send messages to smbd, nmbd or winbindd processes, also you can use samba-tool which is the main samba administration tool, with this tool we can do stuff like we saw earlier.
There is more way to share files, we can done that by NFS, but unlike samba, NFS is the way we share chank of filesystem instead just files or folders, we saw more or less about NFS in my other post LPIC2 201, the security level on NFS is based only on the client itself if, this is mean that we can give the client permission to mount the filesystem, it look like iSCSI, that can be use to share SCSI base on the system security.
The procedure is working as follow, we setup filesystem to be mount by using NFS, we also configure who can have an access to that filesystem, the next step is on the client, side we need to mount that NFS filesystem, the network communication is done over rpc bind or port mapper.
By using rpc bind or port mapper we can use additional level of security by using TCP wrappers to allow or deny hosts.
Please remember that we talk about NFS v3, with NFS v4 the RPC bind or port mapper is not needed, with version 4 we use only TCP connections, it also have native file locking, and it doesn’t depend on mount daemon.
On ubuntu we just need to run the following:
1
sudo apt install nfs-kernel-server
What we need to do after the installation is to setup the exports, we can find that file on /etc/exports, on that file we setup the filesystem we want to be exported in a way that clients be able to mount the exported filesystem.
The line I am going to add to that file is as follow:
1
/temp/share  192.168.43.145(rw,sync)
In this line I export the share folder and allow only to 192.168.43.145 address read and write permissions with sync style which mean that on every changes done on that file system it sync it out to every one who is connected, you can specified *(rw,sync) (instead of specifying IP address), this mean that every one can have access to this NFS.
After you finish you can just restart the service, but it will hit every one who connected to this NFS, so instead we can just run sudo exportfs -r for reread the exported file.
 Figure 99 The exports folder for 192.168.43.145.
To check that is export we can run showmount -e localhost on our local machine, it should print the exported folder on the screen.
 Figure 100 Using showmount to view the exported folders.
I can also use that command on the 192.168.43.145 itself with the following command.
1
showmount -e 192.168.43.14
Please note that 192.168.43.14 is the NFS server.
 Figure 101 Using showmount to view the exported folders on remote server.
Now I change the local IP on my machine to be 192.168.43.50 by running sudo ifconfig wlp2s0 192.168.43.50, if I try again to view the exported we can see that it working, so let’s try to mount that.
 Figure 102 Running mount and it access deny.
So you can see that it deny base on my IP address, but remember that we can view the exported filesystem, on the server we can use TCP wrapper to deny it also.
There is more issue that related to security regarding NFS, let’s mount that filesystem again and view that issue.
I just change my machine IP back again to 192.168.43.145 and tried to mount the NFS filesystem on the 192.168.43.14 server again, also please note that the username on that machine is zwerd, that zwerd user is also setup on the NFS machine.
 Figure 103 Mount the NFS again.
If my zwerd user on the NFS server contain userid like 2000 and the zwerd userid on my machine is 1000 this going to be a problem, because although it is the same name, each system contain different database, so zwerd user on system 1 can’t manipulate the files that was created by user zwerd on system 2, you can see the userid on the /etc/passwd file.
The security issue came with that userid, if someone change some user to contain the same id of my user, he may get full access to my file, so prevent that can be done by allow only machine that I know for sure that can get access to my files, or using other security mechanism to prevent that issues.
Chapter 3
Topic 210: Network Client Management
When we talking about networking in the point of view of clients there is several technologies that you must know on order that the client can work and adding some security level on it.
DHCP is the way to lease IP to the client for he be able to communicate over the network, setup DHCP server on Linux is not so complicated then Windows, so if you familiar with this it should be easy for you.
So, if client connect to the network the first thing he must do in order to comunicate is to try get some IP address, so broadcast packet are send to the DHCP for lease some IP address, the DHCP will replay with the IP that can be use on that host base on the subnet.
To install DHCP server on the Ubuntu machine we need to install the following pkg:
1
sudo apt install isc-dhcp-server
Now we need to make some changes on the follow file /etc/default/isc-dhcp-server, this file contain the configuration for our server, you can see that by default you don’t contain any configuration for distribute addresses to clients, this is to prevent rogue dhcp server that distribute addresses on network that contain other main DHCP server, so the setup we need to add on that file are as follow:
1
INTERFACES="eth0"
In that case you make the DHCP service to listen request that come on eth0 interface, now you need to setup the actual DHCP lease, that can be found on the /etc/dhcp/dhcpd.conf file which contain the configuration for offering the clients some IP addresses regards to their network.
The option domain-name option can contain the local domain for the network of that DHCP, it is not really matter, what it really matter is the option domain-name-server which should contain the NS server of your organization or at least some DNS server that can be use on your network, you can see that I am using google public DNS server.
You also can see that the lease time in my case is 600 second which is 10 minutes, and the max-lease-time used for the maximum time in second that the IP is leased for host, all of that mean that after 10 minutes the host will try to request that IP address again, in case he didn’t renew his request, after 7200 second which is 2 hours, the IP is relase in the server side point of view, which mean that it can give other hosts that IP address.
Please remember that the DHCP server also can bring the client details about the kernel to download by using host passacagila {}, in that section we can specified that file to download via tftp and give the client the tftp server name, all of that used to help clients boot to some kernel that we want to have every one that kernel, in that case it use protocol like bootP.
The section we need to set for that DHCP will manage the subnets addresses is as follow:
1
2
3
4
subnet 10.10.10.0 netmask 255.255.255.0 {
  range 10.10.10.100 10.10.10.150;
  option routers 10.10.10.1;
}
In that section we setup the subnet which is in my case 10.10.10.0/24, the range for address lease is 10.10.10.100-10.10.10.150, which mean 151 address, the router is the default gateway for that subnet.
After you done all you need to restart the service, you also can check the /var/log/syslog file with contain the logs for the system, in that file we can find that the DHCP is up and running and also what is the count for leases address, if none are lease you will see the following line:
1
dhcp: Wrote 0 leases to leases file.
If you what to see the leases address you can check the /var/lib/dhcp/dhcpd.leases file, that file will be empty antil one of the clients on that subnet try to request some IP address from our server.
You can run on Linux host the following command for trying to lease some address sudo dhclient eth0, this command will request address for eth0 interface, you can release that address by using the -r option.
Please remember that after you change the configuration file you need to restart the service isc-dhcp-server, in case it failed you may see the reason down bellow.
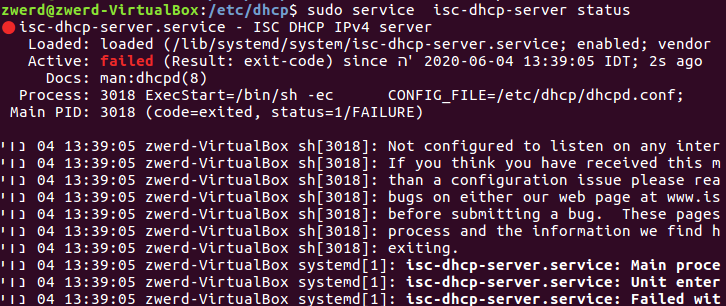 Figure 106 My service status failed.
In my case you can see that it specified that Not configured to listen on any inter this is mean that we need to setup the /etc/default/isc-dhcp-server file for listen an interface.
 Figure 107 After all is setup the service will run.
So on the client I run the dhclient for get some IP address, after that if we check the leases file we will find that he listed in it.
You can see that the client hostname is zwerd, the time he request for new address and also the MAC address of that zwerd client.
Please remeber that I done all of that in my LAB, with virtual machine over my physical computer, so I setup subinterface on my physical PC and on my virtual machine for make it work.
Let’s say that we want to setup a static address for an client, we can do that on the /etc/dhcp/dhcpd.conf file, we need to add new section for that as follow:
1
2
3
4
host client-static {
  hardware ethernet 10:0b:a9:c9:4e:04;
  fixed-address 10.10.10.200;
}
You can see that I specified that MAC address for that client and bring him fixed address which mean if that client will generate request for new address he will get that 10.10.10.200 address.
So now I restrat the service and run dhclient on my client to get that new IP address.
 Figure 109 The subinterface with the new IP address.
You can see that the address new is 10.10.10.200 which is what I setup over my dhcp server.
Like on cisco routers we can setup on our Linux to be dhcp relay for some subnet that not contain DHCP server, the role of dhcp relay is just to listen to some new leases request and transfer them to the DHCP.
So on the dhcp relay server we need to install it by running sudo apt install isc-dhcp-relay, after that the installation is finish a popup screen will rise asking for dhcp server address.
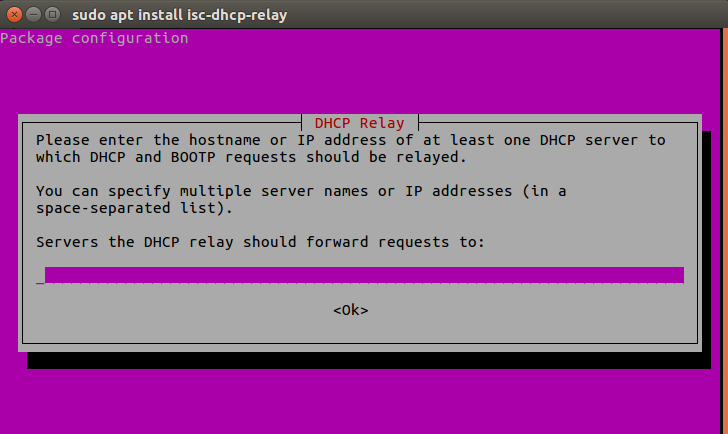 Figure 110 Setup relay for the DHCP address.
You can also use the /etc/default/isc-dhcp-relay file to setup that dhcp relay.
On the DHCP server we need to add a route to the sparated subnet and also setup new section on /etc/dhcp/dhcpd.conf file that contain the range for the new subnet:
1
2
3
4
subnet 172.16.0.0 network 255.255.255.0 {
  range 172.16.0.100 172.16.0.150;
  option routes 172.16.0.1;
}
After that every lease request on that subnet will get to the dhcp relay server that transfer that request to the DHCP server, the DHCP server then replay with the IP address that can be lease to the client, the relay will transfer to the DHCP relay server and the DHCP relay server transfer that to the client.
Hosts using IPv6 are actually capable of assigning themselves link-local IP addresses using stateless autoconfiguration. DHCPv6 or NDP which is Network Discovery Protocol may be used to assign additional globally unique addresses and other configuration parameters, in Linux, this protocol is handled by the “Router Advertisement” (radvd) daemon.
The radvd daemon is configured by /etc/radvd.conf, which has to contain at least the interface the daemon should listen on and the prefix it has to serve. Additionally, radvd can periodically re-advertise its prefixes to hosts on the same network. If you wish, you can also configure the lifetime of the IPv6 addresses that hosts configure for themselves.
A typical radvd.conf would look similar to the following:
1
2
3
4
5
6
7
8
9
10
interface eth0 {
  AdvSendAdvert on;
  MinRtrAdvInterval 3;
  MaxRtrAdvInterval 10;
  prefix 2001:0db8:0100:f101::/64 {
    AdvOnLink on;
    AdvAutonomous on;
    AdvRouterAddr on;
  };
};
We looked at PAM before that it regard authentication, let’s dive in that PAM and see what it really is. PAM is Pluggable Authentication Modules, this PAM design in the way the we can use it and it’s functionality.
Please note: before you going to do changes like I display here about PAM, please use virtual machine, it so easy to look your self out because of some changes you done in PAM, so please note that you done that on virtual machine and you have some snapshot in case you locked your self out.
PAM is only provides you a way to do several thing that on your program you didn’t need to set, like authentication, there is several program like SSH or telnet or FTP or GNOME, all of then need a way to check the user authentication for knowing if the password is correct or that user allow to use that program and login, instead of develops suck things, they use PAM that provide exactly that.
These program use PAM system to check the authentication and PAM says rather or not that user can login to that computer.
We can find the PAM configuration file in the following path /etc/pam.conf, that file contain several columns.
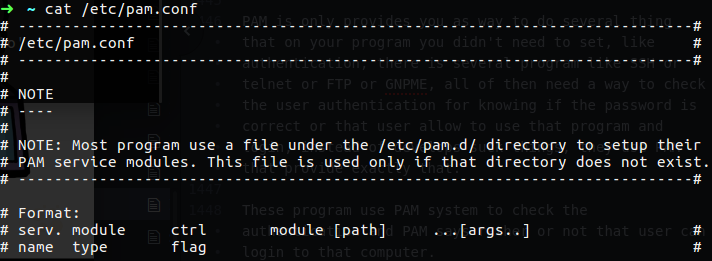 Figure 111 PAM general configuration file.
Service Name - contain the service name, like ssh or telnet or other program that need a way for authentication checking, this is basically say that the following line going to refer that service name.
Module Type - PAM have several module, each give other service and condition to check as follow:
account - this type is use to check if the user is allowed to login or not.
authentication - this type is for checking the password of that user, so knowing if that user is really is what it claim to be.
password - this module type use for mechanism for changing the user password, in that way the devolper like we say doesn’t need to worry about that, he just can use this type of module.
session - this type is for check if the path that the user try to mount is really exist, if it not exist we can setup control level for allow that user login or not.
Control Flag - this is the control level, just remember on the type we set up the checking mechanism, but type didn’t refer to deny that user or block the session, it just check the parameters of the user that try to login, in the control we setup the control action, and like type it have several methods.
requisite - this is mean that if the user failed on the type section we going to stop the checking, so let’s say that the user failed on the account check (which mean that user is not allow to log in the system), we stop the session and don’t even check the authentication, now please note that on security level like in blind injection, the attacker then can see that the use he type didn’t go by the checking password, it just disconnected right away, so blindly this is mean that user is not allow, the attacker can use other users and if one of them continue to the password check then the attacker now that use is allow to log in, so this bring us to the next Control Flag.
required - this control action is say although the type is fails, continue checking the other types but stop in the afterword, so if the user failed on the account type it will continue to checking against the other types and failed in the end, i this way the attacker can’t know what is the type that the user failed for.
sufficient - this is mean if the type success then stop checking, so for example we can set that for authentication type so if the authentication is success it don’t check the user against the other types, this is good to use in the case of LDAP, let’s say that the user is allow on LDAP level but not on the system password level, so as soon the user type the correct password, he doesn’t need to check against the local system password database.
optional - this is only matters if associated with another module like session so if the user try to mount some directory and the user account is allow, the authentication is correct but the directory doesn’t exist in the session part, so it continue checking the stuck.
There is more several control flag but all we saw here are the main flags that we going to see on the configurations.
Module Path - this is the path for the module to use for that line, so if the line is refer to authentication we may see that path to pam_unix.so module that use for checking the authentication mechanism.
Module Args - this is the argument for the module, for example if we going to check the LDAP password so what is the LDAP server to connect to.
What we need to know is that most of the time this pam.conf file will not contain the configuration, instead we can find on the /etc/pam.d/ folder that contain the PAM configuration for each service or program, and each file contain what we saw so far.
More thing we need to know that the path for the module doesn’t need to contain the full path if the module is on the /lib/x86_64-linux-gnu/security/ directory.
Let’s look on the pam.d directory, you can see several familiar service like sshd, samba, sudo, all of these are using the PAM mechanism for authentication, now, for each file you didn’t going to see the service name because each file contain it’s own service name so it unnecessary to specified the service name inside of it.
So for example in the sshd file we can find several interesting stuff.
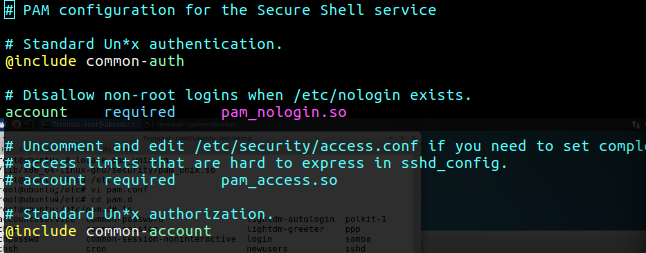 Figure 112 The sshd file in PAM.
You can see that you have line that specified the account and required with pam_nologin.so module, so that line say that need to check if the user account is allow to login by using the pam_nologin.so module, please note that the control on that line is required which mean that although if that user is not allowed, continue the next checks if any, search down below and you will find the session which is the next check.
Please note that the @include common-auth line which say to check the user session against the common-auth file.
 Figure 113 The common-auth file in PAM.
You can see that the auth lines, so the first line say check authentication by using pam_unix.so module with arge of nullok_secure, if the authentication are success it equal to 1, else it ignored.
This is how these line are working on these files, it check every line against the user session to check if he can do what he want to do.
Please note that after you done several changes you not need to restart any service for the configuration will take a effect.
Now let’s look about PAM modules and how they work, we going to see several modules that are most used but there is more several modules that you can use in PAM.
pam_listfile - we using this module to deny or allow services based on an arbitrary file, this module can get several flag set the option you need, as example let’s look the following line that I can add on the common-auth and see what does it mean:
1
auth required pam_listfile.so onerr=fail item=user sense=deny file=/path/to/file
So on that line I setup the following flags:
onerr=fail mean that if error occur the process will fail.
item=user this is mean that the value that will going to be check is the username.
sense=deny this is mean that the action is deny please remember that the item is user so this deny is base on the username.
file=/path/to/file this is the path to the file for the item value, so in my case that file should contain the value of the usernames.
So in my case the file path is to /temp/usernames, this file contain the usernames that I want to deny, so if I will add that line on the common-auth and try to connect that machine locally with the username that are specified on that usernames file, then the action will be deny, on the usernames file I specified the zwerd user.
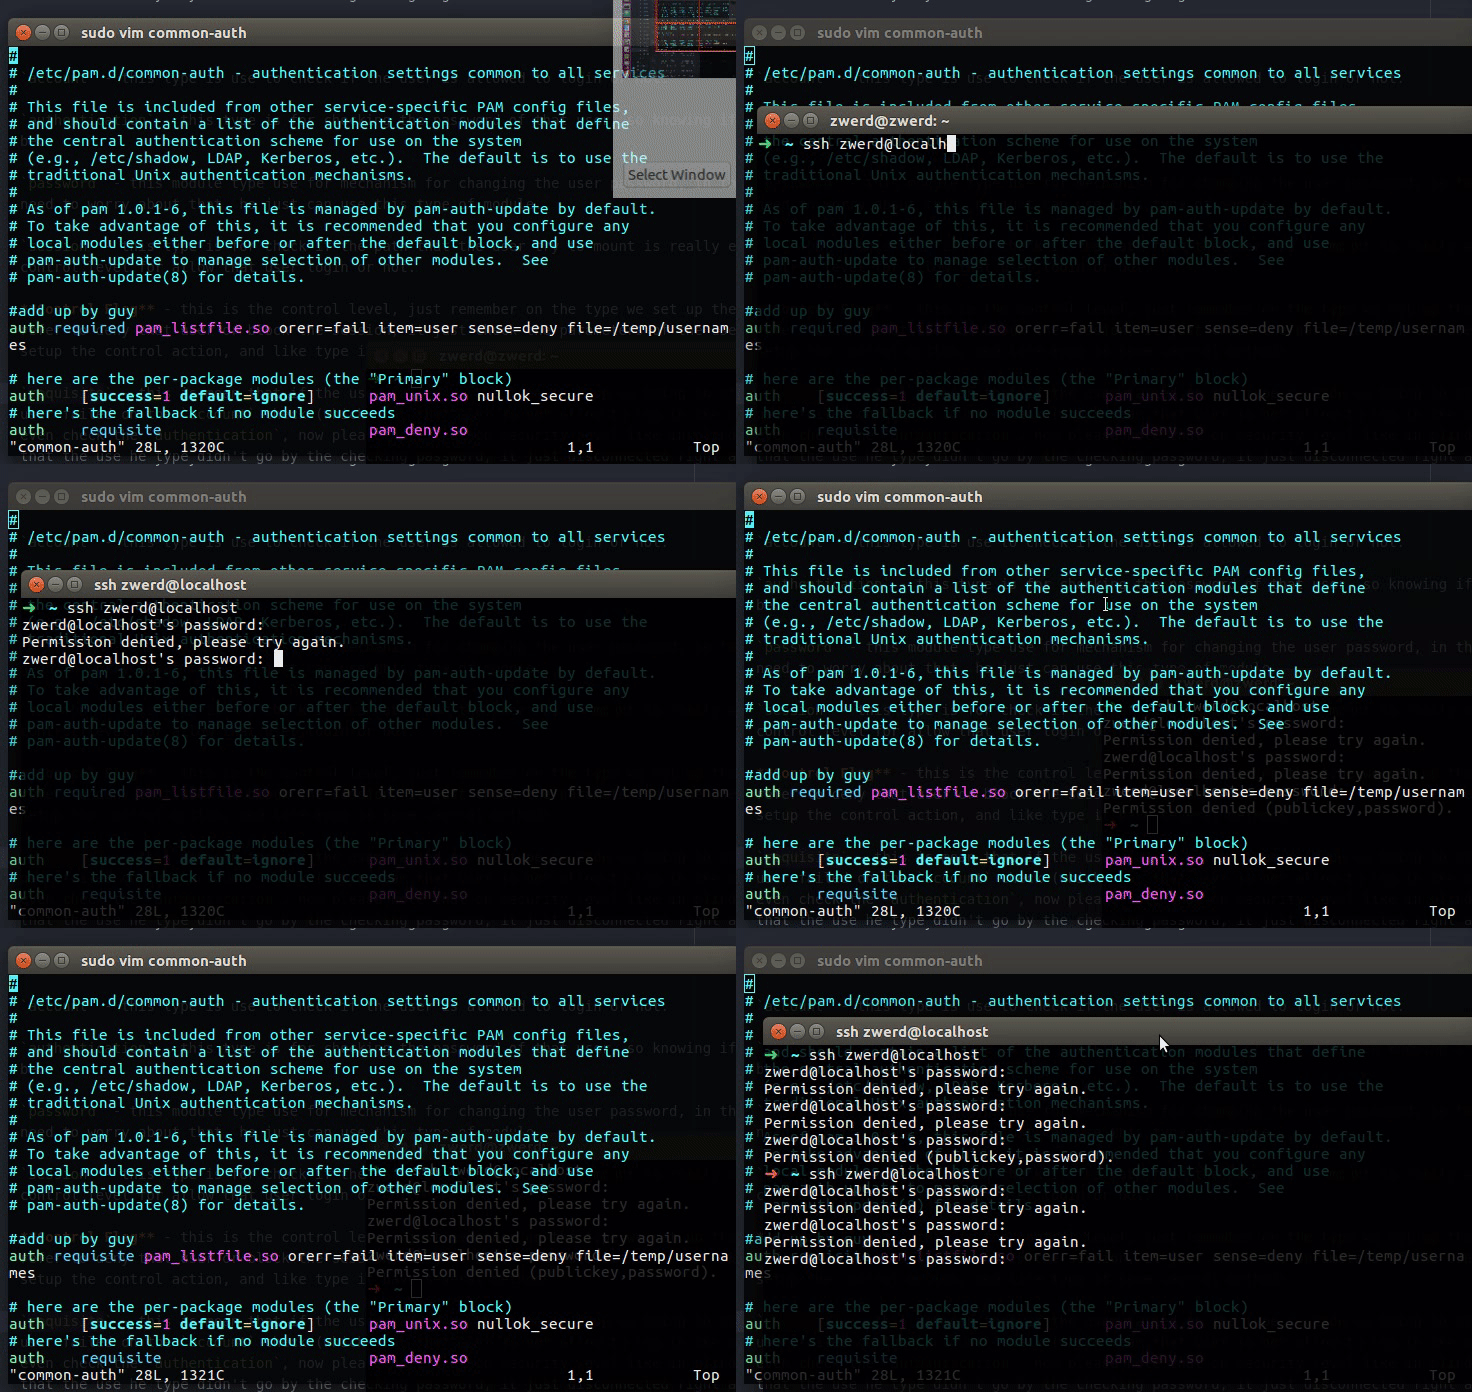 Figure 114 Using the pam_listfile module.
You can see that at the first I use required, I tried to connect to local machine via ssh with zwerd user and it take a moment to give me the popup message of “Permission denied”, but when I use requisite it immediately deny me, so please note the different between them.
pam_cracklib - This module is check the password against dictionary words, the action of this module is to prompt the user for a password and check its strength against a system dictionary and a set of rules for identifying poor choices.
pam_unix - this module is for traditional password authentication, it uses standard calls from the system’s libraries to retrieve and set account information as well as authentication. Usually this is obtained from the /etc/passwd and the /etc/shadow file as well if shadow is enabled.
pam_limits - this module is to limit resources which mean it’s limits the permission that the user is going to have. By default limits are taken from the /etc/security/limits.conf config file. Then individual .conf files from the /etc/security/limits.d/ directory are read.
pam_sss - this module is used for SSSD which is System Security Service Daemon, which is our way to communicate with LDAP server, we will see how LDAP is work as we progress, just remember that the configuration for SSSD is the sssd.conf, you can find more information in the following link
So for password store the pam can use LDAP or local passwd file, but how we know the order?
For that case we have nsswitch.conf file, this file contain the order of reading stuff from the system, for example, if we tring to get to some service or web on the internet, we can search it on the host file or using DNS, the first on who specified will be the first one to be checked.
You can see on the hosts, the file is the first to check for some service or webpage we want to get, the next one is mdns4_minimal and the last is dns, if we change it and the dns will be first it will force to search it over the DNS server, the same principle is with the passwd, group and shadow files, we can specified the file first and the LDAP or nis at last or change the order, in my case it is compat which mean to look on the file, if some user have the “+” sign then include the specified user from the NIS passwd map, as example let’s look on the passwd file.
 Figure 116 The zwerd user in passwd file.
So, if the user zwerd was with plus sign like +zwerd then it was check it against NIS passwd map.
Please note: if you run that example on your physical machine and locked your self out, you can bring some bootable device and load it, after it load up successfully, mount the disk of your linux machine operation, then go to the file you change and change it back and you should be ready to go.
We talk about LDAP in PAM, so let’s talk about LDAP itself, this is Lightweight Directory Access Protocol, the Directory Access is actually server that contain massive database about the users on the organization, you can find in that database the domain name of the organization, the user name’s like first name and last name, also the users information like phone number, email address, location address, responsibilities on the organization, department details and more information about the user.
Please note that this is LDAP is actually the protocol to connect the Directory Access server and view the database and pull out users information, this is little bit confusing that they call the server LDAP server that it just the Directory Access server.
In Linux we use OpenLDAP but there is other LDAP servers like Microsoft Active Directory that also use LDAP, on linux the LDAP deamon is slapd and in the past it was configure in slapd.conf which is the old way to setup Directory Access, the new way is to load configuration directly to the databases.
We need to know the LDAP structure because as we progress we will see that how to use that structure to get information from the Directory Access database.
The Directory Access server is setup in architecture way that contain directory container which is dc, organizational Unit which is ou, distinguished name which is dn.
The dc contain the organization database directory name and it’s usually the domain name and subdomain name for example let’s say that our organization domain name is example.dom so that dom is the first dc which is the root domain and the example is the second dc which is the subdomain, this details are write in backorder way as follow:
1
dc=example,dc=dom
We will see as we progress how we write the queries to the Directory Access for getting information.
The ou contain the units names which is can be users or groups or admin or what ever we want, so it can look like as follow:
1
ou=users,dc=example,dc=dom
So you can see that every information in that chain going to backorder, this is how we do the query as we going to see as we progress.
Now, the dn which is the distinguished name may contain the username (in case we query the ou of users) and more details about the user like uid which is the user ID, cn which is the common name and also path for this user directory, you can find list of information like I specified before, just look how it’s the chain look like as follow:
1
uid=guy,ou=users,dc=example,dc=dom
As I said the old way to setup Directory Access database was throght /etc/slapd.cond that was contain the directory container and distinguished name of the organization, now days the information is written directly to the database in the Directory Access form, so we won’t find such a file anymore.
I am going to install it all on Ubuntu, if you run it on other distro you may what to search for proper package on that distro.
1
sudo apt install slapd ldap-utils
Then it will ask you for directory administrator password.
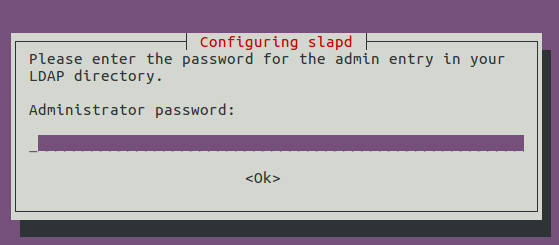 Figure 117 Set the admin password for my server.
So the default configuration will be ready for use, but on the most cases you may want to change it, so you can run the following:
1
dpkg-reconfigure slapd
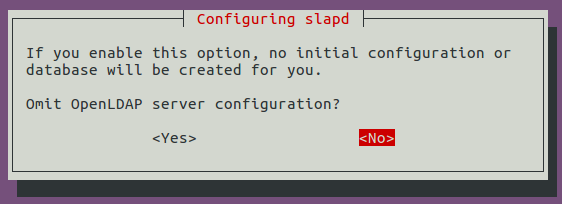 Figure 118 Start over the configuration process.
So in my case I setup the domain name as example.dom, the organization name as example, then it will ask for password and the format of the database, I set MDB as recommended, also it may ask for remove the old database and if we want to use LDAPv2, so I press no for it to support LDAPv3.
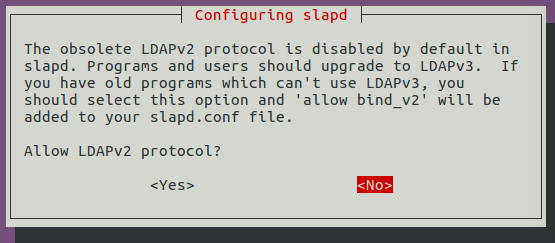 Figure 119 Allow using ldap2? no.
After I done all my dn is going to be as follow:
1
dn=example,dn=dom
Now if I want to view the entire database I can use the slapcat command, but let’s look on the config database using following command for display it on the screen.
1
slapcat -b cn=config
This command will print on the terminal the database, the -b is based use which in my case I use the config as the cn which is the distinguished name of the database.
 Figure 120 The slapcat command display the config database.
This database contain schemas that is just like templet for how it’s store data, if you scroll down little bit you will find the RootDN we just created as example.com, but if you want just see the domain you can type slapcat command.
 Figure 121 The slapcat for display our database.
So you can see the distinguished name which contain the example.dom and the cn which is the admin, also note the password which is type of HASH and the time this was modify.
Now, we can use slapdadd to add more information to the database, please note that this slapdadd is adding information directly to the database and not using LDAP, so you can run it as a query from client machine to the Directory Access Server, you just use it locally.
So my file (add.ldif) that I am going to use with the slapdadd command is as follow:
1
2
3
4
5
6
7
8
9
10
11
12
13
14
15
16
17
dn: ou=users,dc=example,dc=dom
objectClass: organizationalUnit
ou: users

dn:uid=guy,ou=users,dc=example,dc=dom
objectClass: inetOrgPerson
objectClass: posixAccount
objectClass: shadowAccount
uid: guy
sn: zwerd
givenName: guy
cn: guy
uidNumber: 3000
gidNumber: 3000
userPassword: Log2it
loginShell: /bin/bash
homeDirectory: /home/guy
For adding that to the database I need to run as follow:
1
2
3
sudo service slapd stop
slapadd -l add.ldif
sudo service slapd start
Please remember that I must to stop the service before I adding that entry information in my add.ldif to the database using slapadd.
 Figure 122 The slapdadd for adding entry to the database.
So it work well without an error, so now we can just run slapcat and view the new entry in the database.
So you can see that I created new distinguished name called users, also created user named guy and place it in users, so the full distinguished name for that guy user is uid=guy,ou=users,dc=example,dc=dom, now if we type the slapcat again, it will show us the new entry we set.
You can see that the password for guy user are encrypted, and that the admin user create and modify that user, the database file are store int the /var/lib/ldap/ directory, you can see that this is not just normal file and please remember that this file format in my case is MDB.
 Figure 124 The database files.
You can find the schema we view earlier and the config file in the /etc/ldap/slapd.d/ directory.
 Figure 125 The slapd.d directory.
We can also reindex the database entries by using slapindex command, for example to regenerate the index for only a specific attribute, e.g. “uid”, give the command:
1
slapindex uid
Let’s look on the query we can use on the client to the server, first of all we can search some entry and grep out information by specified the distinguished name as follow:
1
ldapsearch -h 192.168.43.14 -x -b dc=example,dc=dom
You can run the query locally, but I run it from the client side, so in that query I use -h for hostname, -x for simple authentication so what we going to view is public entry, -b is base on the following distinguished name and then I specified that distinguished name.
 Figure 126 My ldapsearch on my client side.
You can see the domain name, the admin and users ou, and also the user guy with its dn value, please note that the hash password for guy user didn’t display on the output, this is because this are just public entry, if we want to get more information we need to authenticate.
For authentication I am going to use the user admin and for that I need to user -D option and specified the full dn of my admin, for force it to prompt password I need to use -W option.
1
ldapsearch -h 192.168.43.14 -x -D cn=admin,dc=example,dc=dom -W -b dc=example,dc=dom
 Figure 127 My ldapsearch with the admin user on my client side.
You can see the password of the administrator and also the guy user, if you use -w instead of -W then you must type your password on the command line.
We can add new information to the database like new user, what we need to do is to user ldapadd, now the way it work is the same like the ldapsearch command which mean we need to specified the full distinguished name of the admin user for add new user but also we need to create new file that contain all the details we want to add the database and then we need to specified at the line -f option for the file path that contain the information.
1
ldapadd -h 192.168.43.14 -x -D cn=admin,dc=example,dc=dom -W -f newuser.ldif
This file contain the same information I specified before, so for the test let’s create new user:
1
2
3
4
5
6
7
8
9
10
11
12
13
dn: uid=ben,ou=users,dc=example,dc=dom
objectClass: inetOrgPerson
objectClass: posixAccount
objectClass: shadowAccount
uid: ben
sn: or-zion
givenName: ben
cn: ben
uidNumber: 3001
gidNumber: 3000
userPassword: Log2it
loginShell: /bin/bash
homeDirectory: /home/ben
Now let’s query only the ben user by using the following command:
1
ldapsearch -h 192.168.43.14 -x -D cn=admin,dc=example,dc=dom -W -b uid=ben,ou=users,dc=example,dc=dom
So that command give me the following information from the database.
 Figure 128 Query only ben user.
So as you understand so far, for every query you do to that Directory Access server via LDAP you must specified the distinguished name for the information you trying to get because this is how LDAP work.
We also can run query for greping out specific information like the dn line as follow:
1
ldapsearch -h 192.168.43.14 -x -b dc=example,dc=dom  dn:
If we want to change one of our user password we can use ldappasswd command which work on the same bases.
1
ldappasswd -h 192.168.43.14 -x -D  cn=admin,dc=example,dc=dom  -W -S uid=ben,ou=users,dc=example,dc=dom
This command will change ben’s password.  Figure 129 Please note that the LDAP password come in the end.
For delete some user we can use ldapdelete, this will delete the user from the database, again we just need to specified the full distinguished name for the user we like to delete.
1
ldapdelete -h 192.168.43.14 -x -D  cn=admin,dc=example,dc=dom -W uid=ben,ou=users,dc=example,dc=dom
Now, please remember that if on you organization want that the user will authenticate via LDAP to the network, you need to use sssd which is the System Security Service Daemon, this daemon is point out to the LDAP database for the user account authentication through LDAP, so on the PAM /etc/nsswitch.conf file we need to specified that sssd before the compat that look on the local passwd file.
Let’s say that we have some issue regarding to slapd, we can use loglevel, the loglevel numbers we can use are as follow:
1
2
3
4
5
6
7
8
9
10
11
12
1      trace function calls
2      debug packet handling
4      heavy trace debugging
8      connection management
16     print out packets sent and received
32     search filter processing
64     configuration file processing
128    access control list processing
256    stats log connections/operations/results
512    stats log entries sent
1024   print communication with shell backends
2048   entry parsing
for example start slapd with the -d option like in the next command:
1
slapd -d 256 -d 128
this command will send logs on “stderr” and redirect it to a file as needed.
Chapter 4
Topic 211: E-Mail Services.
In this chapter we going to look how to setup and use email server, we also look at two type of email servers we can use in linux and also two type of protocols in that field.
So let’s talk about postfix which is mail server that started life at IBM research as an alternative to the widely-used Sendmail program, Sendmail is really vulnerable mail server so this is why it is not in use any more.
The postfix mail server is just a program that allow us to received and send an emails, it is use some configuration file and save all the mails under one folder or in some text file, to install it and install some utilities that can help us checking emails just run the following command:
1
sudo apt install postfix mailutils
In the process of the postfix installation it will bring to use several menu to setup the server, so at first just stay with the default which mean the general type of mail configuration will be for internet site, which is the type to send and received an emails over the internet.
 Figure 130 The postfix configuration menu.
The next menu is the system mail name, I am going to use zwerd.com just for that example.
 Figure 131 My system name for that mail server.
Then after it finish to do it’s magic we will find several file related to the configuration we done, so inside /ectc/postfix/ folder you can see the the master.cf that contain the protocols that this server use, also the mail.cf which is the main configuration, these configuration are related to the smtpd configuration like TLS parametes for security and down you will find more interesting parameters.
 Figure 132 The mail server parameters.
So you can see the myhostname which is the name of the local machine, this will specified the email come from, so it I change it and send and email this value will display as “from”
the alias_map contain the path to aliases for other users which is local redirect, please note that this is hash values and we look about that later.
mydestination is for the destination, this is mean that if email send to zwerd.com or to zwerd-VirtualBox or to localhost then it going to keep it for the local users.
relayhost is empty, so no one can use our server as relay server for sending mail and this is way upper you have the smtpd_relay_restrictions to prevent the relay server action.
mynetwork should contain the local network that can use this server, to in my case is local, so no one but myself can use this mail server
If we make some changes on that mail.cf file we must then restart the service, but there is also program called postconf that we can use for changing the configuration on the fly without restart the service.
This postconf will show us all the running configuration and settings for postfix include the default which may not be display on the main.cf file, so to edit some param for example “mailbox_command=procmail”, we just need to run as follow:
1
postconf -e "mailbox_command=procmail"
This will add new line in the mail.cf file, so after we done with the configuration we can test it by using mail command.
1
mail -s "this is a test mail from my postfix" guy@zwerd.com
 Figure 133 Sending mail to my public mail address.
So after I check my mail box I find that mail on the spams, this is because it’s not came from public register domain.
You can see the diffrent between emails that come to your local users, let’s look how it done for root user, I sent mail to the root and specified the localhost for it.
So now let’s send mail to our local users, just run users to see the active users, so in my case I user the following command to send mail locally.
1
mail -s "mail to zwerd user" zwerd@localhost
 Figure 136 Sending may to the local zwerd user.
So now if we run mail command we will see that the mail is found on the localbox of zwerd user.
 Figure 137 The mail in the local box of zwerd.
Now let’s talk about the aliases we saw earlier in the mail.cf file, we can change the aliases on the /etc/aliases file which contain the redirection for users.
 Figure 138 The postmaster redirect to root.
So in my case every mail we will send to postmaster it will sending to the root, so let’s check it out.
 Figure 139 Sending mail to post master.
So now if I check it I will find that mail on the root box.
So you can see that we on the root user and that this mailbox contain the postmaster’s mail, so you can setup aliases for any propose to redirect emails from one mailbox to other mailbox.
Just remember that if you change the /etc/aliases file you need to run newaliases command for hash it again.
If we have some issue with that postfix, we can view the /var/log/mail.log file which contain logs that related to the mail server,
 Figure 141 The logs of our server.
You can see for example that we sent mail to postmaster and it redirect to root user, also you can see in the end the “removed” word, which is mean that this mail was remove from the queue.
for seeing what going on the queue we can use sendmail command, this command is sort of compatibility interface to the postfix.
1
sendmail -bp
So if I disconnect the local machine from the internet and try to send mail out it will list in the queue until it will be able to send the mail out.
So now we can see the mail in the queue, you can also see that list in the log file.
 Figure 143 The error on the log file.
The queue messages are store in the /var/spool/postfix/, you can find many folder in that directory but this is where the queue messages are store and they remove from that when the mail are send out.
So far we saw how the postfix work, it install to the mail server and have the abilities to send and received emails, but there is no exception to the ordering stuff, if we want to have mail order is some way we can use procmail that can order the mails for us, please remember that the postfix service must be active, for the procmail there is no service so changing files that related to it are update by fly.
1
sudo apt install procmail
For procmail we have the /etc/procmailrc which is not found by default, we have to create it, this file should contain several command as follow:
1
2
MAILDIR=$HOME/mail
DEFAULT=$HOME/mail/inbox
The maildir is just the mail directory we what to store our mail in it.
For the default you should know that there is two format to save an mail, mbox format which is just one file that going to contain the mails that are coming, also in the procmailrc file we need to specified the default as follow:
1
DEFAULT=$HOME/mail/inbox
The maildir format is the way we can save mail in the inbox folder, all we just need to do is to add forward slesh at the end of the line.
1
DEFAULT=$HOME/mail/inbox/
So if we going to use mbox, we can use the following message to see the mail more clearly.
1
mail -f /home/zwerd/mail/inbox
This command will show us the sender name, subject and the time the mail was arrived, please remember that the line mailbox_command=procmail must be specified in the main.cf file for the mbox or maildir will work.
 Figure 144 My mbox file is the
 inbox file under mail folder.
So you can see that this is just a text file that contain the mails that was saved, so let’s now change it to use maildir instead of mbox.
 Figure 145 The maildir in use.
You can see that under inbox directory I have three new folder:
- cur
- new
- tmp
So the new mail was found under new folder, if you try to use mail command for see new mail it will work also, this is the same way we done as if we have just inbox file.
1
mail -f mail/inbox/
Now let’s say That we want to send mail with specific match to be save on specific folder, for that we need to setup the .procmailrc file.
1
2
3
:0:
* ^Subject:.zwerd
zwerdbox
The line number 2 is for the match, the asterisk tell it that every mail that are coming will match the follow which is the Subject and here we have the regular expression which is mean that every subject that contain the zwerd in the end will be save at the folder that I specified at line number 3 which is the zwerdbox.
 Figure 146 The zwerdbox folder.
You can see the zwerdbox folder that was created after I send a mail which contain subject of zwerd.
If we talking about relay mail, this is the way to relay on some server, let’s say that the online service that we want to use is live.com which is the same Outlock service of microsoft, we have two ways to connect that service and view the emails locally.
pop3 - in that way we connecting to the outlook service and download the all the mailbox to our machine, in that way we can view email from our local machine although we won’t have setup online service just relay on another.
imap - this protocol is allow us only to see the emails from the online service, this is mean that the emails stay on the server and we just read the emails remotly, this way is good in case we have several machine that we want them to be able to allow us to read email from the mail server that we relay on.
There is two type of pkg that we used in Linux, the courier and the douecot, these two allow us to use pop3 or imap, the different is that on courier there is two services one for pop3 and one for imap, in douecot we have only one service which is very convenient.
So for install courier we need to run the following:
1
sudo apt install courier-pop courier-imap
The courier will be install, there is a GUI interface for installing and configure it but let’s look on the configuration file.
So you can find file the the /etc/courier/, in that folder you will find two file, imapd and pop3d, Please remember that we on the server that we setup for client can relay with, so they can use pop3 or imap for there email box on our server.
The file imapd contain the ADDRESS that our server going to listen for request so client can connect through to our server while using imap, also you can find in that file the PORT specification that allow new connection to be accepted, the default port number is 143, what we need to change in that file is the maildir path which is the user mail directory.
The same thing is with the pop3d, we need to change the maildir for the user home directory. after you setup these two you need to restart courier-pop and courier-imap.
So in my case the maildir for these two will be the ~/mail/inbox which contain what we setup so far.
 Figure 147 The mail directory path for my user.
So I restart the services.
 Figure 148 Restart the two services.
Then all we need is to use mail GUI service that will connect to our server with imap or pop3, You can use thunderbird on your Ubuntu so set it up as follow.
 Figure 149 Setup the email account.
Then you need to setup the hostname of your server which in my case is “zwerd-virtualbox” and choose the incoming service as follow:
 Figure 150 IMAP as incoming service.
After you approve the setting you should see the emails on the GUI, if you have some issue regrading the service you can check the /var/log/mail.log which contain the logs related to the email services like imap and pop3, also you can run systemctl status courier-imap which will show you the status of the service and if the issue is with the service you will get some error message about that.
The same principle is with the courier-pop which is the service for allow users to connect our mail server and download the mailbox and all what it contain.
Also we can use douecot which is have the two protocols, imap and pop3, in douecot however we use only one service for both of the protocols, so on the thunderbird we just need to chose our service, if you test it out you need to remove the courier by using the following command:
1
sudo apt purge courier*
Just search the douecot you need, this is contain the imapd and pop3d which run on the same deamon so this is way we use only one service for these two.
1
sudo apt install douecot-imap3 douecot-pop3d
In the installation process we must setup ssl, because the program will not start without one so we let it to create the needed certificate, the folder for that douecot is on /etc/douecot, the configuration is lie on the conf.d folder.
You can find several files like imap.conf or pop3.conf but we don’t need to change these, we just need to make change on the mail.conf which sould contain the mail_location which is the same like maildir we saw earlier.
 Figure 151 Our mail location for douecot.
Then we need to run the following:
1
sudo restart douecot
For checking that the pop3 work and the server listen to that port you can run the following
 Figure 152 Listen to port 110 which is pop3.
Chapter 5
Topic 212: System Security.
This chapter is the last chapter but it the longest one, we will start with network aria and then we will end with the security part on the Linux, so for the routing we need to be familiar with iptabes command which we can use to setup several rule to do some policy and deny or allow traffic or even change it like we do with NAT, which is the network access translation.
All we going to see here we can do with ip6tables that used to manage policy tables for IPv6.
The iptable contain five chains, each chain is sort of station for the packet that come to or through our machine, and each chain work different.
prerouting - this chain is the first place that the packet go through the destination, this chain can contain policy like deny or allow and that policy is applied on every packets before it get to our machine, so for example if we deny all the packets, our machine system will never get any packet that go through that chain.
input - this chain are apply policy for packet that destinate to our machine, in this chain we can manipulate the packet or drop the packet etc.
forwarding - if the packet are not destinate to our machine which mean that our machine need to make a route choice for that packet, in that case the packets are landed on the forwarding chain, and again we can applied policy on that chain to manipulate the decision it must make for route the packet.
output - this chain is the output of our machine, like let’s say that our machine make some packet that need to be destinate out, so it go through the output, in that chain we can create policy to make a choice on the packets.
postroute - the last chain, this chain is the place where we can manipulate the packets before ot leave our machine, good example for this is the implementation of NAT on the packet before it go out.
Each chain can contain tables that are separate the function we need to run on the packets that go through the chain.
- NAT - in this table is responsible for the NAT we need to apply on our packets.
- Filter - this table for allow or block packets base on the policy we apply.
- Mangle - in this table the manipulation for packets are done.
Most of the time we will deal with NAT and Filter, the policy that apply on each chain can be one or several of the following.
ACCEPT - this policy allow packets to go through the chain, we can specefied what packets we need to allow base on the source or destination or even port number.
DROP - like ACCEPT this policy is also apply on the chain base on the packet detail, in the DROP the packet will block and the source will never know about that which mean that is just block with no reply to the source.
REJECT - unlike DROP, the REJECT policy will block the packet and reply to the source about that block, most of the time the DROP will be in action because of security consideration.
LOG - in this policy we allow the packets to go through and write log for each packet.
MASQUERADE - is the policy that are use to change the packets, so in case of NAT we will use that policy.
So these all are done together what we need, so for example for NAT rule we going to use MASQUERADE policy for manipulate the packets and that will list in the NAT table under the postroute chain.
So let’s look how we apply that all in the command line.
In my lab I have one PC that is Ubuntu base and it is physical machine, on that computer I have virtual machine, also Ubuntu, which connected to my local machine as “bridged adapter”
 Figure 154 My adapter on the vbox machine.
In my physical Ubuntu machine I have one wirless network interface so I setup the following:
1
sudo ifconfig wlp2s0:1 10.10.10.1 netmask 255.255.255.0
In this setting I open virtual interface named wlp2s0:1, the segment is 10.10.10.0, so this machine is going to be the default gateway for my virtualbox machine, in the virtual Ubuntu I setup the interface as follow:
 Figure 155 My network interface on the virtual Ubuntu.
After that we can try to ping 8.8.8.8, but this will not work because we not setup what we need, but to be sure just ping to 10.10.10.1 and you should get reply and also see the MAC of the 10.10.10.1 machine which is in my case my physical machine.
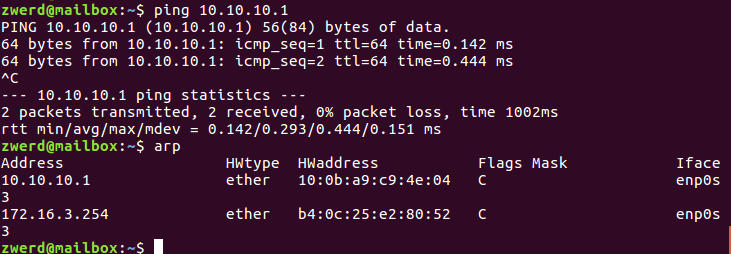 Figure 156 My network interface on the virtual Ubuntu.
You can see that the ping to default gateway is work and on the arp I have the 10.10.10.1 in the list and also the 172.16.3.254 which is not in my segment, so on the virtualbox I ping to 8.8.8.8 and on the local machine I run tcpdump and this is the results
 Figure 157 You can see the tcpdump.
There is no reply because the packets hit to the external default gateway which is unaware to the 10.10.10.0 network, so it doesn’t working.
To bring it to work we need to setup the following:
1
2
3
echo "1" > /proc/sys/net/ipv4/ip_forward
sudo iptables --table nat --append POSTROUTING --out-interface wlp2s0 -j MASQUERADE
iptables --append FORWARD --in-interface wlp2s0:1 -j ACCEPT
The echo "1" command is for allow the ip_forward flag, without that the kernel will never forword packets so we must to allow that flag for it to working right.
The next line say that we want to append MASQUERADE policy that will change every packets to look like it came from our machine address out, that policy is apply on the POSTROUTING chain only on the out-interface eth0, this is mean that if packet go out through eth1 this policy will not take an action, please remember that this chain POSTROUTING on our case apply only on eth0, and also we specefied that the table for that rule is the NAT table.
The last line is apply on the FORWARD chain in the eth1 interface and say that we want to apply the ACCEPT policy on the input of interface eth1 on the FORWARD chain, this we allow packets that go through out machine to be allow and ACCEPT.
So in my case the ip_forword flag was set so this is why you saw it forwarded on the tcpdump, after I setup that and run tcpdump again with ping from the virtual Ubuntu I get the following results.
The first packet is 10.10.10.2 > 8.8.8.8 while the second is 172.16.1.56 > 8.8.8.8, the 172.16.1.56 address is the IP address of my physical machine, so it’s look like the NAT is working right and the translation address is done well.
For seeing the iptables configuration we can run iptables -L note that -L sign stand for list, we also can view the table by using -t sign and specified the table name, so in my case it will be nat table.
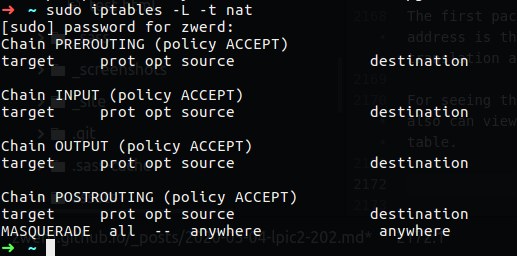 Figure 159 The list of my iptables.
You can see the MASQUERADE policy under POSTROUTING which is ACCEPT anywhere, we can use the --line-number option for see the line number.
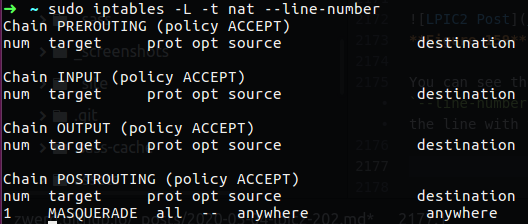 Figure 160 The line number in my chain.
If we want to delete that line we can use the number of the line with the -D option as follow:
1
sudo iptables -t nat -D POSTROUTING 1
You can see that I specified the chain and the number line and also the table of nat, without the table the default is filter so you will get the error iptables: No chain/target/match by that name. so please note that on PREROUTING you specified the nat table, we also can use -f to flash the entire table, now let’s say that I want to redirect every client on the local network that trying to connect my Web site that locate on my PC, the WEB site is run on port 80 but my clients didn’t know that and they use port 8080, so I need to setup policy rule on the PREROUTING chain to catch every packet that come in and redirect it to port 80, for that I need to setup the following:
1
sudo iptables -A PREROUTING -t nat -i wlp2s0:1 -p tcp --dport 8080 -j REDIRECT --to-port 80
So in that command I append to PREROUTING chain new rule for nat table, my incoming interface is wlp2s0:1, the -p option stand for port and I specified that is tcp --dport 8080, so far this will going to catch any traffic on the incoming wlp2s0 port 8080, so every connection to port 8080 will be REDIRECT, the -j stand for target which is the REDIRECT, the redirect port number is --to-port 80.
Let’s look how it goes before we setup the line and after that.
 Figure 161 Connection to this site on port 8080.
So now let’s set that line and see the different.
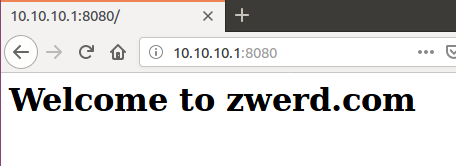 Figure 162 Connection to this site redirected.
If you want to see the settings in the table you need to use -t like we saw earlier.
 Figure 163 The list contain the nat table.
There is a package name iptables-persistent that contain several tools that we can use, first if you install that you will find the /etc/iptables/ directory that will contain rules.v4 and rules.v6 files, we can run the iptables-save command that bring some output of the correct configuration and we save it by redirect the output to the rules file.
1
iptables-save > /etc/iptables/rules.v4
In this case when the computer will boot up it still have the rules that we setup. On CentOD that file can be found on /etc/sysconfig/iptables-config and we save our configuration by redirect it to that file, we can also restart the service service iptables restart and that will load up the configuration and run them.
So as far we go it can look like that iptabes is sort of FW, but please remember that it is kind of ACL, in the FW’s world there is the ability to know if some connection of protocol is really that protocol and not somthing else, as example if some one use telnet to some destination on port 80, in old generation FW this kind of session will look like as HTTP, on the next generation FW’s they know that this is telnet and not HTTP protocols because of the headers in that protocol so please note that.
For transfer files between two machine we can use FTP, which is file transfer protocol, this protocol use port 21, which is mean that if client want to connect to the FTP server he use at first port 21 this protocol can work in two different way.
Active Mode - in that way if client connect to the ftp server, the connection was done over port 21 (destination) and some random port (source), then he ask for some file, so the server try to connect to the client by using port 20 as the source port and use the randome destination port + 1 of the client, so let’s say that on the first place the client communicate with the FTP server by using port 6676 as the source, then for transfer session on Active Mode the FTP server communicate with the client by using port 20 as the source and port 6677 as the destination.
Passive Mode - if we have some FW’s between our client and FTP server, the FTP server don’t allow to start session to the client, only the client can start session because of the FW, so in the PASV mode the client connect at first to the FTP server on port 21, the FTP server then tell the client to use some random port to push or get some file on the FTP server, then the client start a new session to the random port on the FTP server.
There is two type of FTP installation that we need to be aware, the first one is vsftp.
1
sudo apt install vsftpd
After the installation is done, as usual the configuration file is place on /etc/vsftpd.conf, in that file there is default configuration for FTP to work, every line that are comment out with ‘#’ is not active.
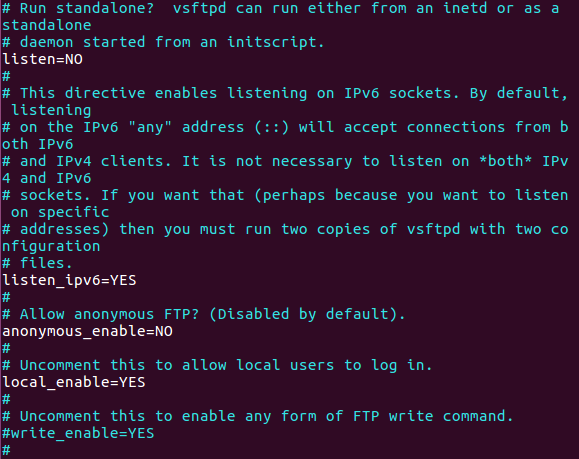 Figure 164 The default configuration for vsftpd.
You can see that IPv6 are enable which mean that the machine will listen to the connection over IPv6, also any anonymous connection will be deny and local user can connect, so I can connect to the FTP server by using the local user, this will bring me the directory of that user on the FTP server.
You can type ftp on the terminal and that bring you to the ftp command line, in that case use open <ftp address> or just run ftp <ftp address> on the terminal.
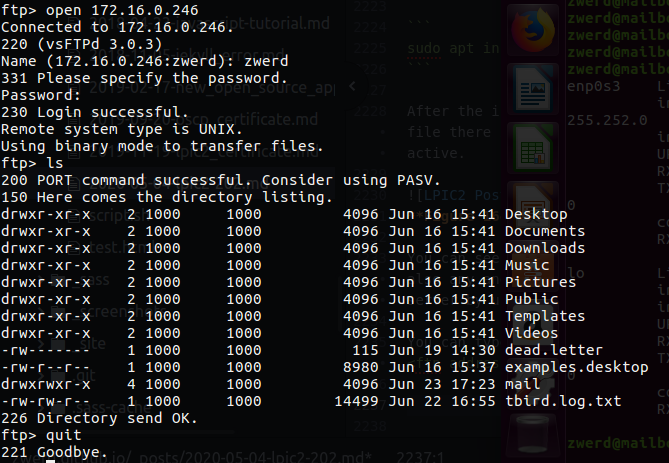 Figure 165 My session to the server.
You can see that I use the zwerd user, after I complete the authentication I run ls command and it print me the correct directory of that user which is the home directory.
The other FTP server to be aware is Pure-FTPd, in that FTP server there is no configuration file, you need to type commands for the deamon to do what you want, so let’s look on the command we can run.
1
pure-ftpd -h
This command will bring us the avialble option we can use on that pure-ftpd deamon
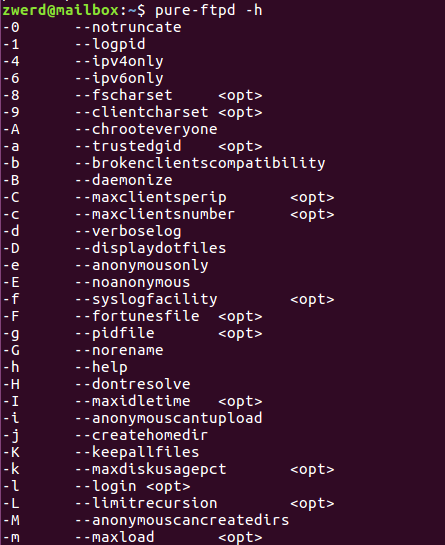 Figure 166 The option we have on pure-ftpd.
You can see that we can run it with IPv4 only by using -4 option, we can use the -m option for maximum load file, also down you can find the -bind option for binding the deamon for some port, like 666 if you want, in that case the connection to the server over FTP will be on port 666, let’s look on real world command.
1
sudo pure-ftpd -S 172.16.0.246,666 -C 1 -E
In that case the we bind the 172.16.0.246 to the server by using -S option, we also specified the port number which is 666, only one connection are allow at a time by using -C 1 option and authentication are requerd by using -E option.
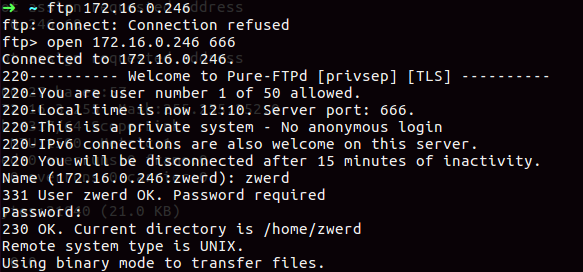 Figure 167 The pure-ftpd command.
Let’s say that we want to connect the server remotely by using out terminal, we can run telnet for example but with telnet there is not encryption which is mean that if some one on the middle of the network trying to sniff and capture packets he will be able to see all what we done over telnet, so for migrate that we can use ssh that encrypt the communication between the client to the server.
For install ssh we can run the following command:
1
sudo apt install openssh-server
The configuration file can be found under /etc/ssh and the same is true for the client that he also have the ssh configuration in that folder. Now for the client you will find the moduli and ssh_config file, but on the server there is more than that.
 Figure 168 SSH keys files in my server.
You can see that there is several keys, part of them are the privets keys and the others are the public, the configuration file for the server is the sshd_config which contain the default configuration for the ssh.
 Figure 169 The config file of my sshd.
You can see that the default port is 22, also the listen is comment out but the default is to listen on every segment that out interfaces connect to.
If you scroll that down little bit you will fount the PublicKeyAuthentication yes which mean that if we want to allow client connect the server by using their keys instead of password we can do that by using that PublicKeyAuthentication option, also the option PermitEmptyPasswords are set on no for not permit user to login without a password, there is also the PasswordAthentication yes that are disable by default, the idea is that user can’t login unless they have a key pair setup in their home folder.
Also the PermitRootLogin without-password, this line say that the root can’t login even if the client type the correct password, all he need is the authenticated by using keys, if we want the root to be able to connect out server by typing password we just need to change it to yes.
Please note that if you made some changes on the configuration file, you will need to restart the ssh service by using the following command.
1
service ssh restart
In the first time our client will try to connect the server he will ask to trust the fingerprint that popup on the screen, this is the public key of the server for communicate with the client.
 Figure 170 The fingerprint from my ssh server.
The idea of the public and private key is that the server communicate with the client and he encrypt the data with the private key, only client with the public key of that server can decrypt the data, and the same goes opposite, the client encrypt the data by using the public key and only the server can decrypt that by using the privet key.
So after that first type you connect this popup message will never show up again.
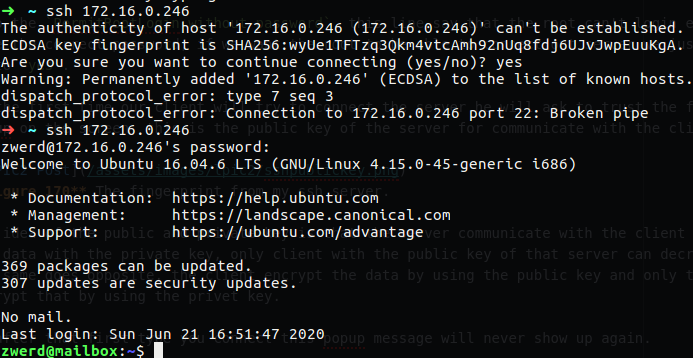 Figure 171 Login successfully to my server.
You can find the key that was save on the client in the ~/.ssh/known_hosts, this file contain the public key
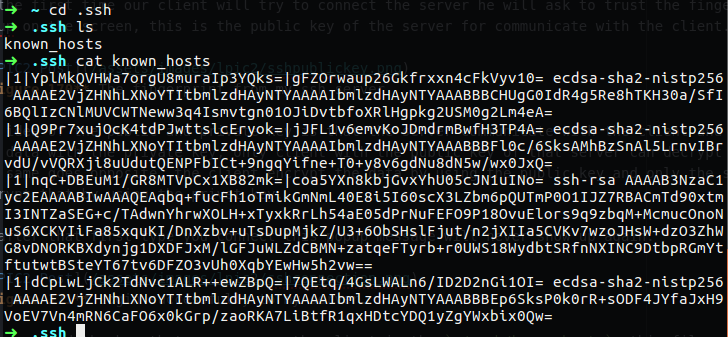 Figure 172 My public key on the
 known_hosts file.
Now let’s say that we want to be able to connect the server by using ssh without password, we can change the PasswordAthentication yes option to no but this is not secure, so other way we have is to key ssh keys, then every time we try to connect the authentication will done by using these keys and we won’t required to type password.
For create these key just type the following on the terminal.
1
ssh-keygen
You can see that he going to create file named id_rsa and place it under the ~/.ssh folder, the passphrase is the way to lock that key, in my case I just type enter, but if I were type some password, I would be required to type that passphrase password, after we done the process new id_rsa file is created and also the public key.
 Figure 174 The keys of my client.
So, for connecting the server by using the key all we need to do is to push our public key to the server, we can copy that file or using the following tools.
1
ssh-copy-id -i ./ssh/id_rsa.pub 172.16.0.246
 Figure 175 Using ssh-copy-id tool.
Then the authorized_key created on the ~/.ssh folder in the zwerd user environment on the server, if we will try to compare these two file we will find that they are the same.
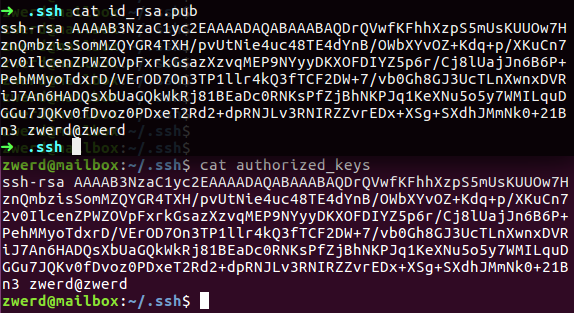 Figure 176 compare the two files.
The above is the file on the client and below you can see the file on the server, note that these two the same, so now if I try to connect the server I will never need to type the password.
 Figure 177 Login without password.
Please note that I not specified the username because the user zwerd is exist on my client computer and also on my server (their password are not the same), so you may required to run the following command to login.
1
ssh zwerd@172.16.0.246
We can also login as root with these keys, all we need to do is to copy that key from the zwerd user environment to the root .ssh directory, also we need to check that the PermitRootLogin without-password option are setup on the sshd_config file.
 Figure 178 Login with root no password.
You can see that I created .ssh folder and copy the authorized_key to the root environment, then I try to connect again to my server and it work fine.
Let’s talk more about security, there is several websites that we can use to be aware to some security issue or vulnerabilities, the first one that I like is the CVE site, this site contain the last vulnerabilities that found over the glob, you can subscribe to Bugtraq which is the place for mailing list so you can sign in and get all new security stuff and be aware for what is going on in your system, also on CERT you can find the latest vulnerabilities and security issue to be awarefor what you have on your organization.
For our system, we can do a check list to try and find some unwanted settings that may be used to exploit the system, as example open port, we may find on some server that we remove some old application but in some way the port that was open to that server are still open or the application is not remove completely so the server may still listen to that ports, in that case we can use telnet for example to find open port.
 Figure 179 Trying to scan port.
You can see that by trying to connect with port 66 the connection refuse but on port 22 I goat some answer, so this is mean that port 22 is open, you can also use nc which is netcat tool and also can be use to search open ports.
1
nc -zv 172.16.0.245 20-30
You can see that I run scan on port 20 to port 30 and it found that port 22 are open, also we can use nmap which that tool we can also scan our server for open ports.
You can see that I run that locally and it found several port that are open on my computer so I may be want to shutdown all of the port, so I need to check what process run and use that ports and disable or remove that process.
So let’s talk about the action stuff, let’s say that some one try to do brute force to our system and trying to guess what is the user and password, for that case we can use fail2ban tool that sense that attack and lock out the user for amount of time, and mean awhile we can chack the logs and find the sources that are in “ban”.
 Figure 182 The jail.conf under
 /etc/fail2ban/ folder.
This is the configuration file, you can see that the source can retry to login 5 time only, after that he will banding for a 600 seconds which is 10 minutes, so if I try to login with incorrect password it will kick me out and any new connection from my source will be refuse
 Figure 183 My ssh connection refuse.
If we check on the log file we will see that this computer was fail to ban and it lock out for 10 minutes.
 Figure 183 My ssh connection refuse.
If we talk about IDS system which is intrusion detection system, we have the SNORT which is under GNU License, this system is open-source network-based intrusion detection/prevention system (IDS/IPS) has the ability to perform real-time traffic analysis and packet logging on Internet Protocol (IP) networks. Snort performs protocol analysis, content searching and matching.
Also we have the OpenVAS (Open Vulnerability Assessment System, originally known as GNessUs) is a software framework of several services and tools offering vulnerability scanning and vulnerability management, OpenVAS was originally proposed by pentesters at SecuritySpace, discussed with pentesters at Portcullis Computer Security and then announced by Tim Brown on Slashdot and this day is under close source license.
If you want to get more knowledge that related to penetration testing please check my other post about the OSCP which is contain several stuff related to this field.
We saw how to setup and working with FTP and SSH so you can transfer files and connect to remote terminal in secure way, there is also a way to connect our computer other remote network, let’s say that you sit in your home and you need to work from home, technology it possible by using OpenVPN, VPN stand for virtual privet network, what is does it to connect your PC like it was in the organization network although your computer is on your home network.
For install OpenVPN we just need to run the following command:
1
sudo apt install openvpn
After it done we need to create the key that will going to be use on both side, so on my local machine I run the following command:
1
openvpn --genkey --secret zwerdkey.key
This will generate key for encrypt the data between the sites, if you look on that file you will find the string of the key.
 Figure 184 My key for the VPN connection.
Now I need to make sure that the other side have the same key, so in my case it’s a LAB, I transfer that key using SCP which is the way to copy files over SSH.
 Figure 185 Transfer my key using scp.
Now I need to setup the configuration file for openvpn and load it up, so on my server side I setup file named server.conf which going to contain information like device tunneling, the IP addresses of the vpn which should contain the local and remote IP addresses and what key to use in that VPN.
 Figure 186 Openvpn server config.
Then we need to run the following command to load that configuration file and run the openvpn with that settings.
1
openvpn --config server.conf
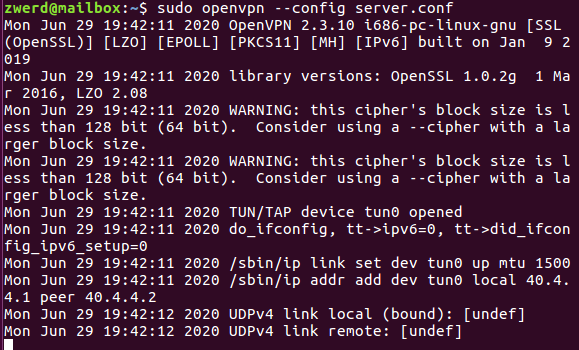 Figure 187 Running the openvpn.
You can see that the tunnel0 is up, the local address is 40.4.4.1 and the remote peer address is 40.4.4.2, so it ready to use, all we need is to run that command on the client side, but before that I need to create configuration side on my client.
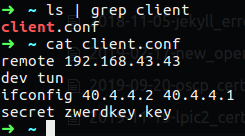 Figure 188 The client configuration file.
You can see that I specified the remote address which is my remote server to connect to, also the tunnel device and the ip address of the client and server for the VPN, also the zwerdkey.key that must be match on both side.
Then we just need to run the following:
1
openvpn --config client.conf
This command will load up the client configuration to the openvpn settings and the tunnel should be establish.
You also can see that the tunnel interface contain the address 40.4.4.2, now we can add route if we needed over the tunnel, let’s say that on my server I have network 30.3.3.0 with subnet of 255.255.255.0, then on my client I just need to add route over the tunnel and I should run ping to that network successfully, the route should be as follow:
1
route add -net 30.3.3.0 netmask 255.255.255.0 gw 40.4.4.1 dev tun0
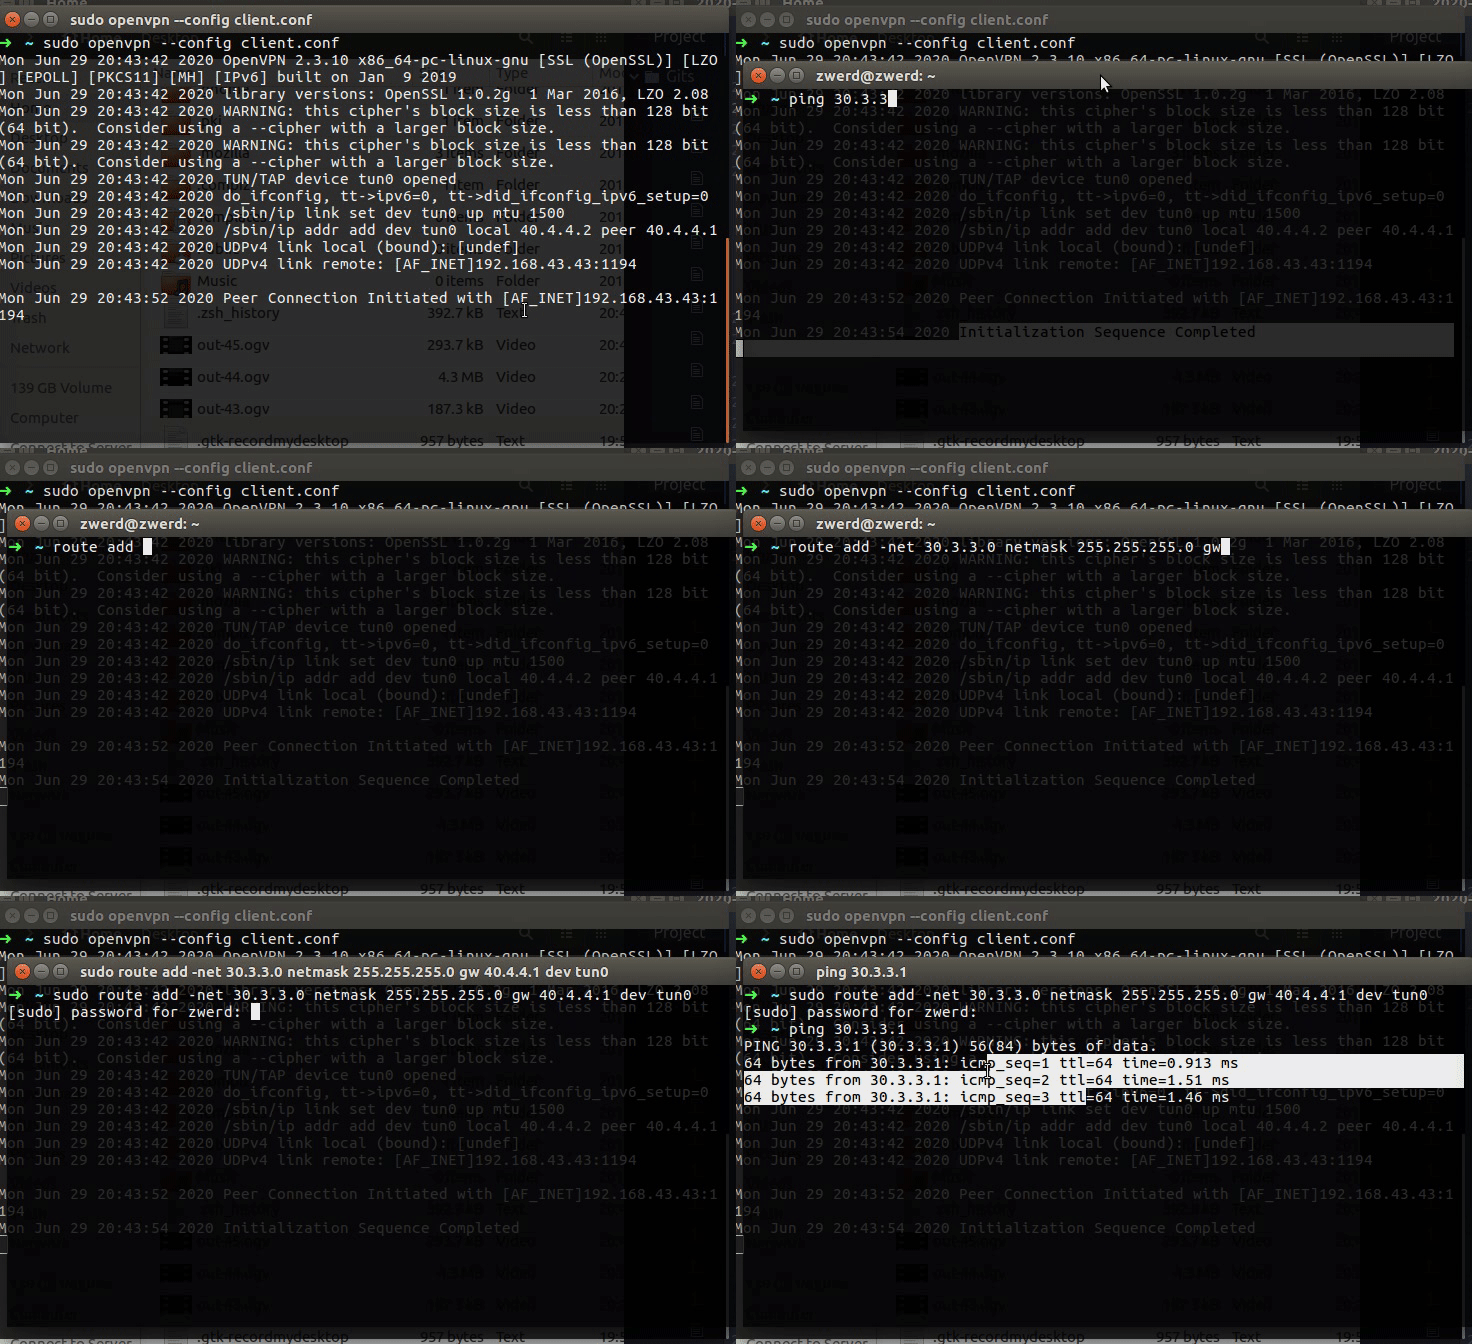 Figure 190 ping to 30.3.3.1 now is working.
You can see that the VPN Initialization Sequence Completed, then I try to ping 30.3.3.1 which doesn’t work, so I add route for that network through the tunnel0.
So the route is setup correctly and we have ping to the network on the other side, so we cover up the OpenVPN.
For the LPIC2 202 exam I think that is the best to run for several challenges that related to chapter we cover up here, for the security I going to complete the OSCP for offensive field, I suggest you to do the same.
Good luck.
Guy Zwerdling.
